Photography Basics – A Definitive Guide
As an enthusiast and advisor in the world of photography, I am thrilled to share some insights into photography basics. You will be able to understand the essential concepts and terms commonly used in this captivating art form. Photography has the power to freeze moments in time and capture the beauty of the world around us. Whether you’re a beginner just starting your photographic journey or someone looking to brush up on the basics, this article will provide helpful descriptions and examples of key photography basics.
Introduction
Welcome to the fascinating world of photography! It’s a realm where creativity meets technical knowledge, and every click of the shutter holds the potential to tell a story or evoke emotions. In this article, we’ll delve into the fundamental aspects of photography, exploring the terms and concepts that form the building blocks of this visual art. You may also wish to check ethical considerations taking photographs to avoid any difficulties when out and about.
Did you know? One of the best places to buy a camera is from Amazon. See 10 reasons to buy a camera from Amazon HERE. They have daily deals which can offer tremendous value for money. Check out daily photography deals HERE.
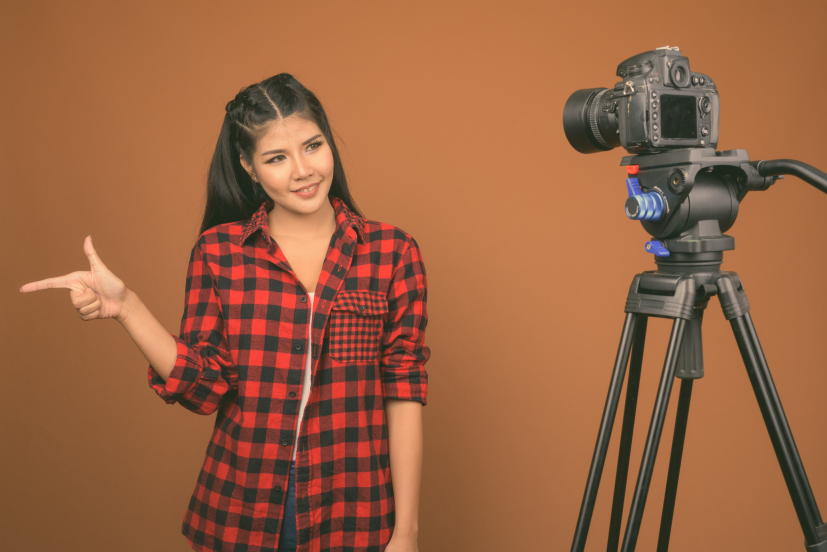
Camera
You need a camera as the primary tool used to capture photographs and the very first of your photography basics. There are different types of cameras available, ranging from smartphones and point-and-shoot cameras to advanced DSLRs and mirrorless cameras. Understanding the capabilities and features of your camera is one of the most important photography basics and crucial for capturing the best possible images. Familiarize yourself with the various settings, such as aperture, shutter speed, and ISO, as they directly influence the exposure and overall look of your photos.
<< see the best sellers in DSLR cameras at Amazon >>
Exposure
Exposure refers to the amount of light that reaches the camera’s image sensor when a photo is taken. It plays a vital role in determining the brightness and detail in your images. To achieve a well-exposed photograph, you need to find the right balance between three key photography basics: aperture, shutter speed, and ISO.
Aperture: The aperture is the opening in the lens that controls the amount of light entering the camera. It is measured in f-stops, with a lower f-stop value (e.g., f/1.8) indicating a larger aperture and more light entering the camera. Adjusting the aperture also affects the depth of field, which determines the sharpness of the subject against the background.
Shutter Speed: Shutter speed refers to the length of time that the camera’s shutter remains open, allowing light to reach the image sensor. It is measured in fractions of a second, such as 1/1000 or 1/30. Faster shutter speeds freeze motion, while slower speeds create motion blur. Selecting the appropriate shutter speed depends on the subject and desired effect.
ISO: ISO represents the sensitivity of the camera’s image sensor to light. A lower ISO (e.g., ISO 100) is less sensitive, suitable for well-lit environments, while a higher ISO (e.g., ISO 1600) increases sensitivity, allowing for better performance in low-light conditions. However, higher ISO values can introduce noise or graininess in the image. Experiment taking the same subject with different ISO settings to see how your camera changes the picture clarity.
Composition
Composition refers to the arrangement of elements within a photograph. It involves making deliberate choices to create visually pleasing and balanced images. A well-composed photograph captures the viewer’s attention and conveys a sense of harmony. Here are two key aspects of composition:
Rule of Thirds: The rule of thirds is a guideline that divides the frame into a 3×3 grid. By placing key elements along the gridlines or at their intersections, you can create a more balanced and engaging composition. For example, positioning the horizon on the lower third of the frame when photographing landscapes often produces a visually appealing result. Some modern cameras will display the 3X3 grid in the viewfinder to assist composition.
Leading Lines: Leading lines are lines within a photograph that draw the viewer’s eyes towards the main subject or point of interest. They can be actual lines in the scene, such as roads or paths, or implied lines created by objects or shapes. Effective use of leading lines adds depth and guides the viewer’s gaze.
Focus
Focus is the process of achieving sharpness and clarity in a photograph. It ensures that the subject appears crisp while the background remains appropriately blurred or in focus, depending on your artistic intent. There are two primary focus methods to consider:
Autofocus: Most modern cameras come equipped with autofocus systems that automatically detect and focus on the subject. You can choose between different autofocus modes, such as single-point autofocus or continuous autofocus, depending on the subject and shooting conditions.
Manual Focus: Manual focus allows you to take full control over the focus point by adjusting the lens focus ring. This method is useful in situations where autofocus may struggle, such as low-light environments or when capturing subjects with minimal contrast.
>>> Buy camera kits CLICK HERE <<<
Depth of Field
Depth of field refers to the range of sharpness in a photograph, from the nearest to the furthest point. It is influenced by the aperture setting, the focal length of the lens, and the distance between the camera and the subject. Understanding depth of field allows you to create images with different levels of background blur and emphasizes specific areas of interest. Read our detailed Depth of Field article HERE.
Aperture and Depth of Field Relationship: Aperture plays a significant role in determining the depth of field. Use a wide aperture (smaller f-stop number) to result in a shallow depth of field, where the subject is sharply focused while the background appears blurred. Conversely, a narrow aperture (larger f-stop number) increases the depth of field, bringing more of the scene into focus.
Bokeh: Bokeh is defined as “the effect of a soft out-of-focus background that you get when shooting a subject, using a fast lens, at the widest aperture, such as f/2.8 or wider.” Simply put, bokeh is the pleasing or aesthetic quality of out-of-focus blur in a photograph.
Did you know? One of the best places to buy a camera is from Amazon. See 10 reasons to buy a camera from Amazon HERE. They have daily deals which can offer tremendous value for money. Check out daily photography deals HERE.
White Balance
White balance is the adjustment of colors in a photograph to ensure accurate representation of white and neutral tones under different lighting conditions. Light sources emit different color temperatures, such as warm (yellowish) indoor lighting or cool (blueish) outdoor daylight. Proper white balance ensures that colors appear natural and true to life.
White Balance Presets: Most cameras offer white balance presets, such as daylight, cloudy, tungsten, fluorescent, and flash. These presets adjust the color temperature to match the lighting conditions. Selecting the appropriate preset helps eliminate unwanted color casts in your photos.
Custom White Balance: In situations where the preset white balance options may not accurately represent the lighting conditions, you can create a custom white balance. This involves capturing a reference image of a white or neutral gray object under the same lighting conditions as your subject. The camera uses this reference image to calibrate the colors accurately, resulting in more accurate white balance.
Lighting
Lighting is a critical element in photography as it determines the mood, contrast, and overall impact of an image and is therefore one of the most important of the photography basics. Understanding how light interacts with your subject allows you to capture compelling photographs. Here are two types of lighting commonly encountered in photography:
Natural Light: Natural light refers to the illumination provided by the sun or ambient light sources in an outdoor or indoor environment. It offers a range of lighting conditions throughout the day, from soft and diffused light during sunrise or sunset to harsh and directional light during midday. Utilizing natural light effectively can enhance the mood and create beautiful images.
Artificial Light: Artificial light includes any form of lighting that is not natural, such as studio lights, speedlights, or continuous lighting setups. Artificial light provides photographers with full control over the direction, intensity, and color temperature. Use artificial light in studio settings or situations where natural light may be insufficient.
Vignetting
Vignetting refers to a photographic phenomenon characterized by darkening or fading of the corners or edges of an image. It occurs when the light reaching the camera lens is not uniformly distributed across the sensor or film plane. This can be caused by various factors, such as the design of the lens, the use of filters, or improper lens attachments.
>Vignetting can be intentional, used creatively to draw attention to the center of the image, or it can be unintentional and considered a flaw. In post-processing, vignetting can also be added or removed to enhance or correct the overall look of a photograph.
Framing
Framing involves using elements within the scene to create a frame around the subject, adding depth and drawing the viewer’s attention. Frames can be natural, such as tree branches, archways, or windows, or they can be created by using structural objects like door frames or fences. By incorporating frames into your composition, you can create a sense of context and highlight the main subject.
>For example, when photographing a portrait, positioning the subject within a door frame can create a visually appealing frame within a frame effect, leading the viewer’s eyes to the subject’s face.
• Perspective
Perspective refers to the viewpoint or angle from which a photograph is taken. Use perspective to influence how the subject is portrayed and can drastically alter the mood or impact of an image. Exploring different perspectives adds variety and interest to your photographs. Here are two aspects of perspective to consider:
Different Perspectives and Angles: Experimenting with various perspectives, such as shooting from a low angle or a high vantage point, can yield unique and captivating results. Change your perspective to provide a fresh and exciting view of the subject. Reveal details or shapes that may have been unnoticed from eye level.
Adding Depth and Interest: You can use perspective to add depth to your images. Incorporating elements in the foreground, middle ground, and background creates layers and a sense of dimension, making the photograph visually engaging.
>>> Buy camera kits CLICK HERE <<<
Rule of Thirds
The rule of thirds is a compositional guideline that divides the frame into a 3×3 grid. By placing key elements of the photograph along these gridlines or at their intersections, you can create a visually balanced and appealing composition. For example, if you’re photographing a landscape, placing the horizon along the lower third of the frame can create a more visually pleasing image.
Histogram
A histogram is a graphical representation of the tonal distribution in an image. It displays the range of tones from pure black to pure white, with shadows on the left and highlights on the right. Understanding how to read a histogram can help you achieve optimal exposure in your photographs.
Interpreting the Histogram: A well-exposed photograph typically has a histogram that is spread across the entire tonal range, without any clipping at either end. Clipping occurs when details are lost in the shadows or highlights due to underexposure or overexposure, respectively. By analyzing the histogram, you can make adjustments to exposure settings to achieve a balanced tonal range.
RAW vs. JPEG
When capturing photographs, you have the option to save your images in either RAW or JPEG file formats. Each format has its advantages and considerations:
RAW Format:
RAW files contain unprocessed and uncompressed data captured by the camera’s image sensor. They preserve the maximum amount of information and offer greater flexibility in post-processing. RAW files allow you to adjust settings like white balance, exposure, and contrast without significant loss of quality. However, they require specialized software to edit and take up more storage space on your memory card.
JPEG Format:
JPEG files are compressed and processed by the camera’s internal software before being saved. They are smaller in size compared to RAW files and are widely supported across devices and platforms. You can share or print JPEG files without the need for extensive post-processing. However, the compression process discards some image data, limiting the flexibility for adjustments during editing.
Choosing between RAW and JPEG is one of the basic decisions in photography and depends on your workflow and intended use. If you value maximum control and quality, I recommend shooting in RAW, especially for professional photographers or those who plan to extensively edit their images. On the other hand, JPEG is convenient for quick sharing and situations where post-processing requirements are minimal.
Did you know? One of the best places to buy a camera is from Amazon. See 10 reasons to buy a camera from Amazon HERE. They have daily deals which can offer tremendous value for money. Check out daily photography deals HERE.
Post-processing
Post-processing refers to the editing and enhancement of photographs after they are captured. It allows you to refine the image, adjust colors, improve contrast, and apply creative effects. Here are some key considerations for post-processing:
Post-processing Techniques: Post-processing techniques vary depending on the desired result and personal style. They can include adjusting exposure, white balance, contrast, saturation, and sharpness. Additionally, use techniques such as cropping, straightening, and retouching to enhance the composition and remove distractions.
Software and Tools: There are numerous software options available for post-processing, such as Adobe Lightroom, Capture One, and Photoshop. These tools provide a range of features and functionality to fine-tune your images. It’s essential to familiarize yourself with the software and develop your editing skills to achieve the desired outcome.
Remember that post-processing should enhance the original image while maintaining its integrity. Avoid excessive editing that may result in an unrealistic or unnatural appearance.
Canvas photo prints
A great way of showing off your best photos is to use canvas photo prints. If you are in the USA the best place for canvas photo prints is HERE.
Conclusion of photography basics
Photography is an art form that combines technical knowledge with artistic vision. Understanding the use of photography basics is crucial for capturing compelling images that communicate your intended message. By grasping concepts such as exposure, composition, focus, and lighting, you can take control of your camera. Remember, practice is key. Experiment with different techniques, explore various subjects, and don’t be afraid to push your boundaries. With time and dedication, your photography skills will evolve and flourish.
<< see the best sellers in DSLR cameras at Amazon >>
FAQs (Frequently Asked Questions)
Q:What is the best camera for beginners in photography?
A: There are several great options for beginners, such as entry-level DSLRs or mirrorless cameras. It ultimately depends on your budget, preferences, and specific needs. I recommend researching and trying out different cameras before making a purchase.
Did you know? One of the best places to buy a camera is from Amazon. See 10 reasons to buy a camera from Amazon HERE. They have daily deals which can offer tremendous value for money. Check out daily photography deals HERE.
Q:How can I improve my composition skills?
A: You can enhance your composition skills by studying the work of other photographers. Continue practicing framing and rule of thirds, and experimenting with different angles and perspectives. Learning about different compositional techniques and applying them in your photographs will gradually improve your composition skills.
Q: Should I shoot in manual mode or use automatic settings?
A: Shooting in manual mode gives you full control over your camera settings and allows for more creative freedom. However, use automatic modes in situations where quick adjustments are needed or for beginners still learning the photography basics.
Q: What are some tips for capturing better portraits?
A: When photographing portraits, pay attention to lighting. Choose an appropriate background, and communicate with your subject to create a comfortable and relaxed atmosphere. Use a wide aperture (smaller f-stop number) to achieve a shallow depth of field and make the subject stand out. Experiment with different poses, angles, and compositions to capture unique and engaging portraits.
Q: How can I capture sharp and clear photos?
A: To capture sharp and clear photos, ensure proper focus by using autofocus or manual focus techniques. Use a stable shooting position, such as a tripod, to minimize camera shake. Select an appropriate shutter speed to avoid motion blur. Additionally, using a smaller aperture (larger f-stop number) can increase the depth of field and enhance overall sharpness.
Remember, photography is a continuous learning process. Understand the photography basics, embrace new techniques, seek inspiration from other photographers. Most importantly, enjoy the journey of capturing moments and telling stories through your photographs. With dedication and practice, you will continue to grow as a photographer and create images that leave a lasting impact. With all this new information you have discovered here, you will want to know the best place to buy cameras and equipment. We give you 10 reasons why you should buy cameras and equipment from Amazon here.
Further Reading
Check out our other relevant articles:
Photography Light Box: Enhance Product Photography with Professional Results
.
Photography subjects comprehensive guides to different subjects
Ethical considerations taking photographs learn how to take photos without causing trouble or distress
10 reasons to buy camera gear from Amazon


Comments are closed.