How to Expose for Highlights and Shadows in Tricky Lighting
How to Expose for Highlights and Shadows in Tricky Lighting
(Balance highlights and shadows like a pro using these exposure techniques)
Why Balancing Highlights and Shadows Matters
Ever been out shooting and found yourself staring at a scene where the sky is bright white and the foreground is dark as midnight? I’ve been there. As an enthusiast photographer, I’ve learned that how you expose for highlights and shadows can make—or break—a photo.
If you lose detail in the bright parts (highlights) or allow everything to sink into black (shadows), the image can feel flat, lifeless, or just frustrating to fix later. When you get the balance right, your final image has depth, detail, and punch. That’s what I aim for every time.
Understanding Highlights, Shadows, and Dynamic Range
What Are Highlights?
Highlights are the brightest parts of your scene—the gleaming sky, sunlit water, reflective surfaces. They hold a lot of visual weight. When highlights are “blown out” (pure white with no detail), you’ve lost information, and no recovery in post will bring that back.
What Are Shadows?
Shadows are the dark regions—perhaps a subject turned away from the sun or shaded foreground. Blocked shadows (pure black with no texture) also mean lost detail.
What Is Dynamic Range?
Your camera’s dynamic range is its ability to record both bright and dark areas in one shot. In tricky lighting, you often exceed what the camera can capture in one frame—hence the need for smart exposure decisions.
Assessing Tricky Lighting Situations
High-Contrast Scenes
Think midday sun, dramatic skies, bright reflections next to deep shade. These are classic “losing detail” situations.

Backlit Subjects
Subject in shadow, sky or background is bright. Do you expose for the subject (and blow sky) or expose for the sky (and darken subject)?
>>> TODAY’s camera deals CLICK HERE <<<
Mixed Light Sources
Indoor with bright windows, outdoor shade into sunlight patches—your meter gets confused. You need to decide what to protect—highlights or shadows.

Pre-Shoot Techniques to Control Exposure
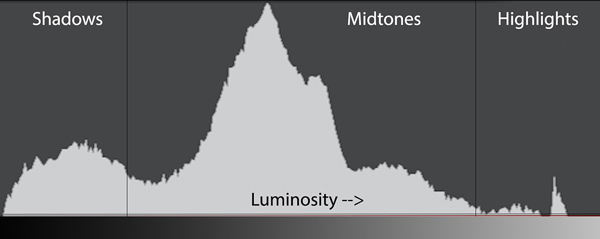
Use the Histogram
Instead of relying on your LCD (which can fool you), check the histogram.
If the graph is slammed right, you risk blown highlights; too far left, you risk blocked shadows.
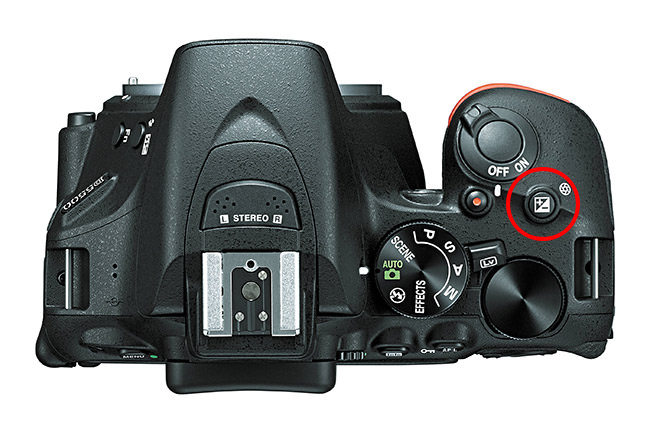
Exposure Compensation
If your meter reads neutral but you know there’s a bright part of the scene (sky, snow) or a dominant dark part (subject in shade), dial in exposure compensation (+ or −) to bias the result toward what matters.
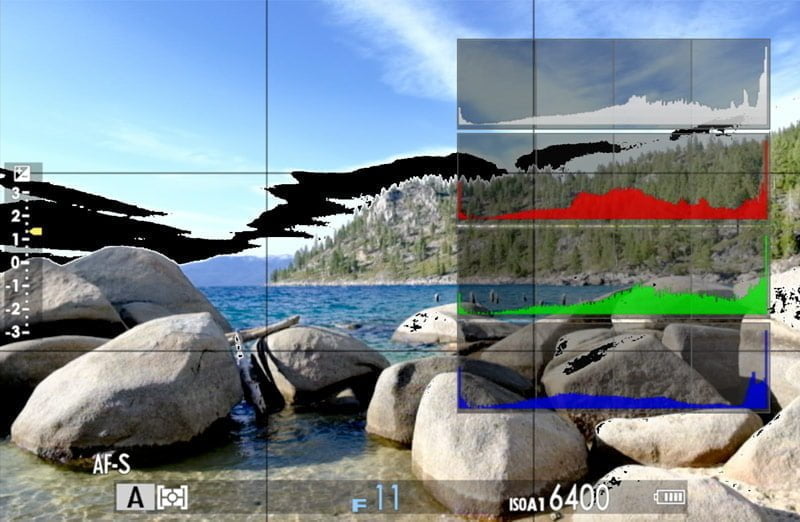
Mirrorless/DSLR Preview Tools
Modern cameras with live view let you see highlight warnings (“blinkies”) or shadow warnings.
Try turning on zebras or highlight clipping alerts—these visual aids reveal problem areas before you click.
Metering Modes and Their Impact on Exposure
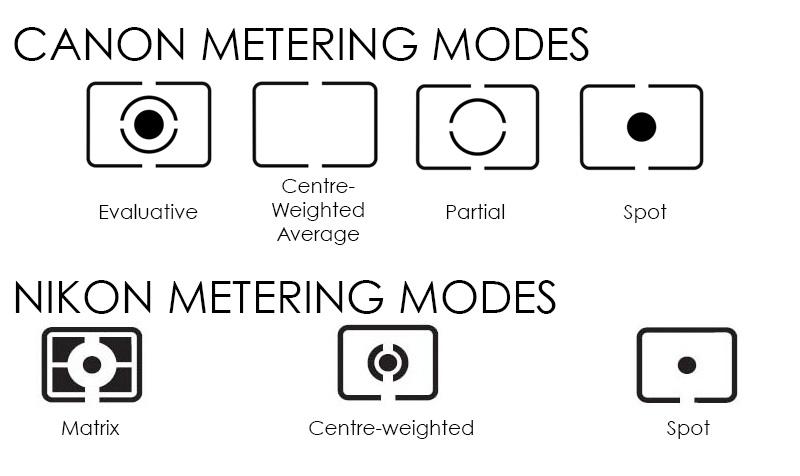
Matrix/Evaluative Metering
This mode considers the whole scene. Great for general use—but in tricky lighting, it might expose neither highlights nor shadows perfectly.
Spot Metering
Meters one small point—ideal for protecting highlights or shadows deliberately.
If you spot-meter off a bright area, you protect highlights; off a dark area, you brighten shadows.
Centre-Weighted Metering
Balances between both extremes—great for portraits or centred subjects.
>>> TODAY’s camera deals CLICK HERE <<<
The “Expose for the Highlights” Strategy
Why Prioritise Highlights?
Think of highlights like fragile glass—they shatter easily. Once you blow them (pure white), there’s no going back.
Shadows, however, can often be recovered (especially if you shoot RAW).
That’s why pros say: Expose to protect the highlights.
Camera Settings & Tips
-
Spot meter on the brightest part of the scene
-
Underexpose by 0.5–1 stop
-
Use ND or graduated ND filters if sky is brighter than foreground
-
Always shoot RAW for recovery flexibility
The “Expose for the Shadows” Strategy
Pros and Cons
Exposing for shadows means you brighten darker parts to hold detail—but you might blow highlights.
Use it when your subject’s story lives in the dark tones.
When Shadows Hold the Story
Example:
-
A portrait in open shade where face detail matters
-
A moody dusk street scene where atmosphere is key
Using RAW and Post-Processing to Rescue Exposure
Why RAW Matters
RAW captures more tonal information—more “head-room” in highlights and more “lift” in shadows.
It’s your safety net in tricky lighting.
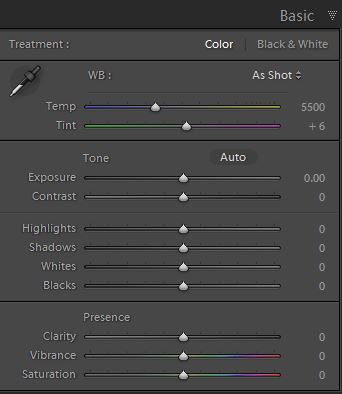
Shadow/Highlight Sliders
In Lightroom or Capture One:
-
Pull down Highlights to recover bright areas
-
Lift Shadows to reveal dark textures
Be careful not to overdo it or you’ll introduce noise.
Exposure Blending & HDR
Take multiple exposures (bracket) and blend them in post when your scene’s dynamic range exceeds the sensor’s capability.

Practical Workflow: From Capture to Final Image
Step-by-Step Capture Plan
-
Identify the brightest and darkest parts of the scene
-
Choose the right metering mode
-
Check the histogram and highlight warnings
-
Adjust exposure compensation
-
Shoot RAW or bracket exposures
Editing Workflow
-
Import RAW files
-
Adjust exposure globally
-
Recover highlights and lift shadows as needed
-
Fine-tune contrast and color
-
Inspect for clipping before exporting
Final Export
Before exporting, check your image on different screens, confirm no extreme clipping, and export in sRGB for web.
>>> TODAY’s camera deals CLICK HERE <<<
Tips to Avoid Common Exposure Mistakes
Blown-Out Highlights
If bright patches lose detail, you’ve likely exposed too much for shadows.
Fix by slightly under-exposing, using filters, or bracketing.
Blocked Shadows
Solid black areas with no texture mean lost data—lift shadows or expose more at capture.
Overdoing Recovery Noise
Too much shadow recovery adds noise and dulls detail. Always zoom in to check before finalizing.

Gear and Environment Considerations
Camera Sensor Capabilities
Some sensors handle wide dynamic range better. Know your gear and adapt with filters or bracketing.
Lenses and Filters
Use quality lenses with minimal flare. Graduated ND filters help when the sky’s much brighter than the land.
Time of Day & Weather
Golden hour and blue hour are forgiving; midday sun is harsh. Overcast days reduce contrast—perfect for even exposure.
Real-World Examples and Mini Case Studies
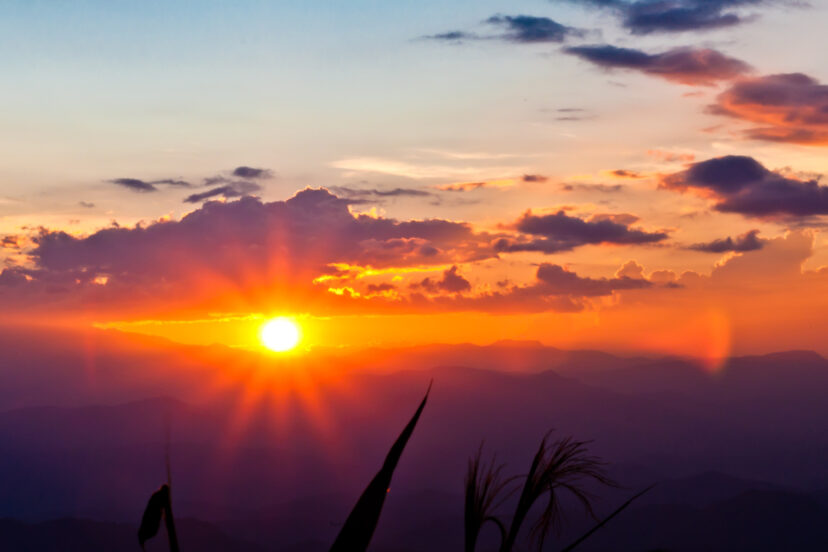
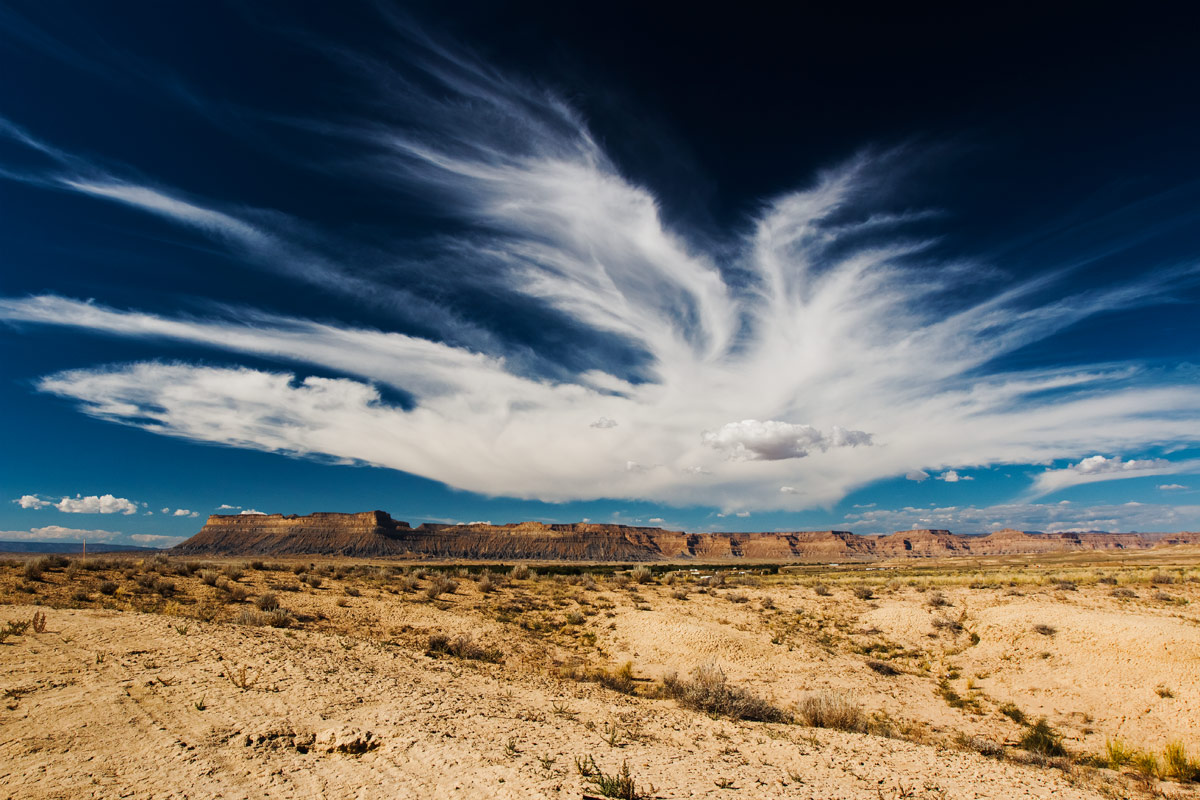
Outdoor Landscape with Bright Sky
I once shot a cliff at sunset—sky on fire, foreground in shadow.
I spot-metered on the clouds, under-exposed by one stop, then lifted the shadows slightly in post.
Result: balanced sky detail and textured rocks.
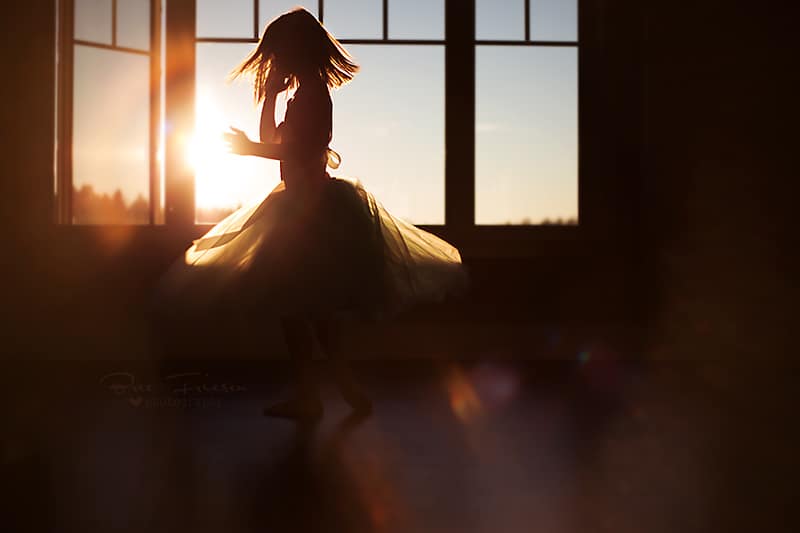
Indoor Portrait with Window Light
Subject near a window with bright light outside?
Meter for the window (highlight) and use a reflector to fill face shadows.
The mood stays natural, with no blown highlights.
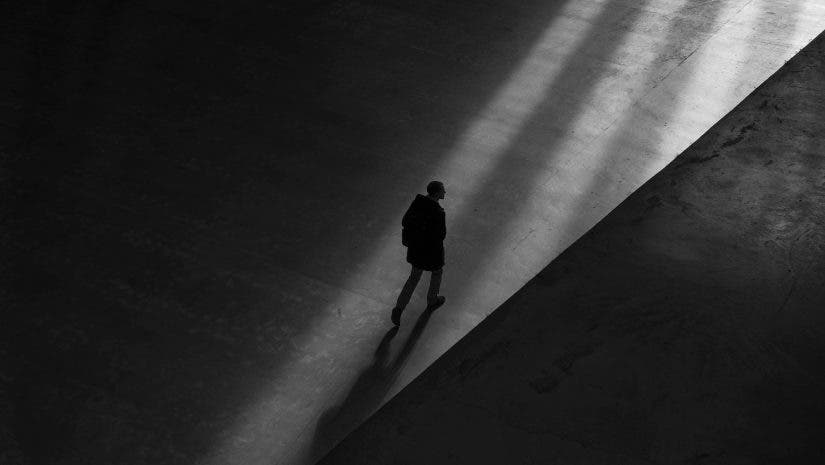
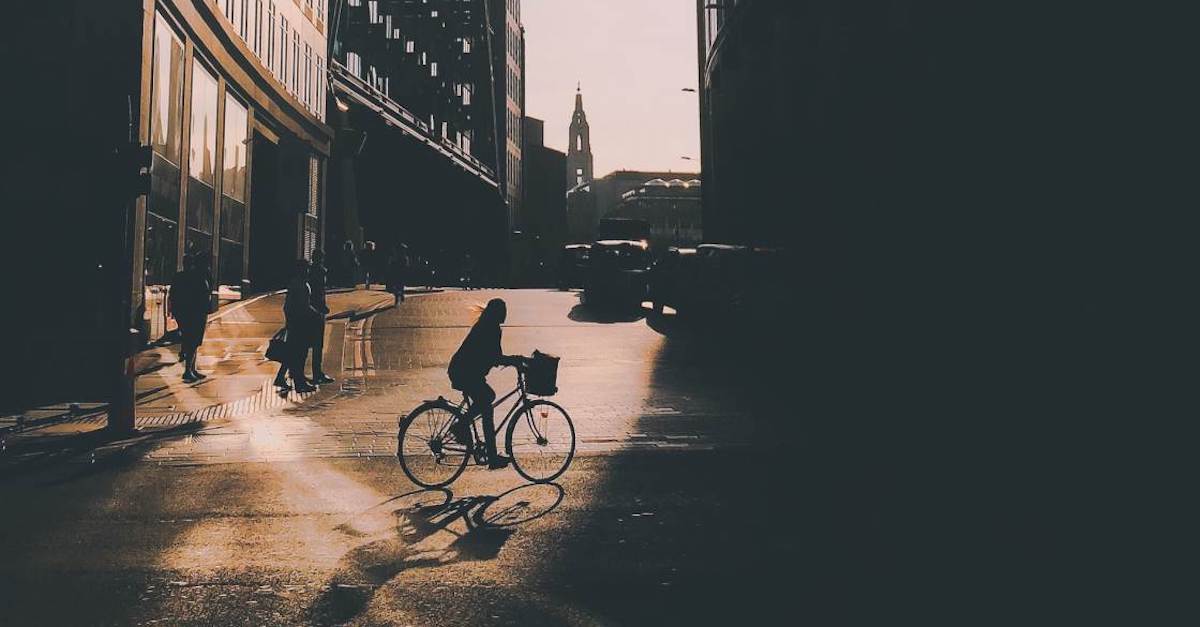
Street Photography at Dusk
At dusk, I shot RAW and bracketed ±1 stop.
Chose the middle exposure for highlight detail, then lifted shadows for street texture—perfect balance.

Summary of Key Exposure Techniques
-
Identify what matters most: highlights or shadows
-
Protect highlights if forced to choose
-
Use RAW, histogram, and highlight warnings
-
Try filters or bracketing for wide dynamic range
-
Apply recovery sliders moderately to avoid noise
-
Gear helps—but skill matters more
Conclusion
Balancing highlights and shadows in tricky lighting isn’t magic—it’s about awareness, decision-making, and workflow.
Each scene demands you ask: What detail can I not afford to lose?
Expose for it, shoot RAW, and polish it in post.
With practice, you’ll intuitively know when to protect highlights, when to lift shadows, and how to confidently expose like a pro in any lighting.
>>> TODAY’s camera deals CLICK HERE <<<
FAQs
Q1: Can I always expose for the shadows and recover highlights later?
Not safely. Blown highlights are often unrecoverable, while shadows usually have more recovery latitude.
Q2: Should I always bracket exposures in tricky lighting?
Only when the scene’s contrast exceeds your camera’s dynamic range—bracketing gives you options to blend or select.
Q3: Is it better to use a graduated ND filter or bracketed exposures?
For skies and landscapes, ND filters work beautifully; for irregular lighting, bracketing is more flexible.
Q4: How far can I push the shadows slider before introducing noise?
It varies by camera, but lifting shadows more than 2–3 stops often brings noise—watch for grain at 100% zoom.
Q5: What’s the best metering mode for high-contrast lighting?
Spot metering. It gives precise control over which tone (highlight or shadow) your camera exposes for.
Further photo tips here:


