Understanding ISO, Shutter Speed, and Aperture
If you’ve ever asked yourself, “What is the exposure triangle in photography explained in simple terms?”, you’re in the right place. I used to avoid my camera’s manual mode like it was a scary monster. Now, I teach others how to make it their best friend. So, let’s break it down together—casually, practically, and step by step.
What Is the Exposure Triangle in Photography?
You’ve probably heard people say, “Get out of auto mode!” But then you’re hit with strange terms like ISO, shutter speed, and aperture. That’s where the exposure triangle comes in.
Why It’s Called a Triangle
It’s a triangle because it has three equally important sides: ISO, shutter speed, and aperture. Adjusting one side affects the others. Just like a seesaw—move one end and the balance changes.
ISO – Your Camera’s Sensitivity to Light
Let’s start with ISO. It tells your camera how sensitive it should be to light.
What Does ISO Actually Do?
A low ISO (like 100) makes your camera less sensitive—great for bright, sunny days. A high ISO (like 3200) boosts sensitivity for low-light scenes but adds digital “grain” (noise).
Common ISO Ranges
-
ISO 100–200: Bright daylight
-
ISO 400–800: Indoor light or shade
-
ISO 1600–6400+: Night or concerts
When to Use Low vs High ISO
Use low ISO when you want sharp, clean images. Use high ISO when there’s no other option and you don’t want to blur the shot.
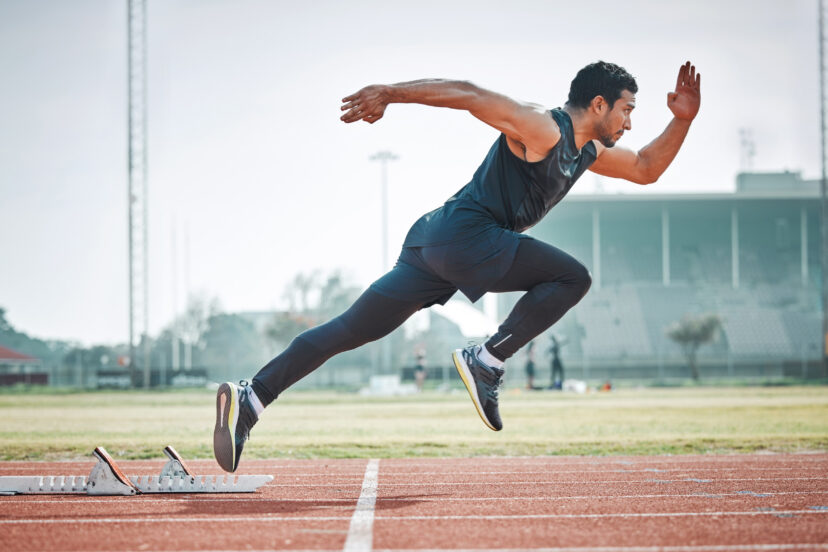
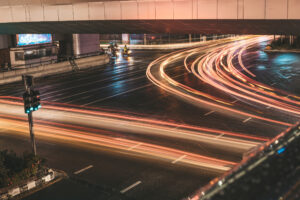
Shutter Speed – Freezing or Blurring Motion
Shutter speed is how long your camera’s sensor is exposed to light. Think of it as your camera’s eyelid.
How Shutter Speed Works
-
Fast (1/1000): Freezes motion—great for sports or action
-
Slow (1/30): Blurs motion—ideal for light trails or waterfalls
Creative Uses of Slow and Fast Shutter Speeds
Want to capture silky water or moving car lights? Use a slow shutter with a tripod. Want crisp action shots? Go fast.
Ideal Shutter Speed Settings for Different Scenarios
-
Portraits: 1/125 or faster
-
Sports: 1/1000 or faster
-
Night photography: 1/10 or slower (with tripod)
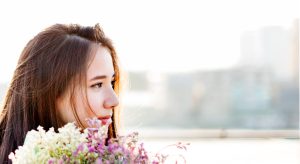
Aperture – Controlling Depth of Field
Aperture is like the pupil of your camera lens—it opens and closes to let light in.
What Aperture Does and How It Affects Photos
A wide aperture (like f/1.8) gives you a blurry background—perfect for portraits. A narrow one (like f/11) keeps everything sharp—great for landscapes.
f-stops Explained Simply
The smaller the f-number, the wider the aperture.
-
f/1.8: More light, less in focus
-
f/8–f/11: Less light, more in focus
Using Aperture for Portraits vs Landscapes
For portraits, shoot wide open (f/1.8–f/2.8) to get that creamy background.
For landscapes, tighten it up (f/8–f/16) to keep everything sharp.
>>> See TODAY’s deals on DSLR cameras HERE <<<
How the Exposure Triangle Works Together
Here’s the key: changing one setting affects the others.
Balancing All Three Settings
Let’s say you open the aperture wider for more light. Now your photo might be too bright—so you need a faster shutter or lower ISO to balance.
Practical Example: Shooting a Portrait
You’re shooting a portrait in golden hour light:
-
Aperture: f/2.8 (blur the background)
-
Shutter: 1/250 (freeze the subject)
-
ISO: 200 (clean and crisp)
Common Exposure Mistakes to Avoid
-
High ISO in bright light = noisy photos
-
Slow shutter without tripod = blurry images
-
Wide aperture in group shots = only one person in focus
Tools to Help You Master Manual Mode
You don’t need to guess. Use tools!
Light Meters, Histogram & Practice Apps
-
Your camera’s meter gives you feedback in real-time
-
The histogram helps you see if you’re over/under exposed
-
Apps like “PhotoPills” or “Lightroom Mobile” help you plan and learn
Tips to Nail Exposure Every Time
There are some old-school tricks that still work great.
My Go-To Method for Quick Setup
When I don’t have time, I follow a two-step rule:
-
Set ISO based on light
-
Set aperture for the effect I want
-
Then adjust shutter to balance exposure
The “Sunny 16” Rule
On a bright sunny day, set aperture to f/16 and shutter speed to 1/ISO. Works like a charm.
Bracketing for Safety
Take 3 photos at different exposures. Later, pick the best—or blend them together.
Final Thoughts: Why Mastering Exposure Matters
Understanding the exposure triangle is like learning to ride a bike. At first, it feels tricky. But once it clicks, you’ll wonder how you ever shot in Auto. Mastering it gives you creative control, sharper images, and way more confidence behind the camera.
>>> See TODAY’s deals on DSLR cameras HERE <<<
FAQs
1. What is the exposure triangle in photography explained simply?
It’s the combination of ISO, shutter speed, and aperture—balancing them gives you the correct exposure.
2. Is ISO more important than shutter speed or aperture?
Not necessarily—they’re all equal. But in low light, ISO can be the quick fix when you don’t want to blur your photo.
3. How do I remember the settings for portraits?
Try this: f/2.8, 1/250 shutter, and ISO 100–400 depending on light. It’s a solid base.
4. Can I fix exposure later in editing?
Sometimes, yes. But getting it right in-camera gives you better quality and more flexibility.
5. What’s the easiest way to practice manual mode?
Start by copying your Auto settings, then tweak one setting at a time. That’s how I learned!
More relevant posts HERE