Photography Lighting
Hey there, fellow photo enthusiast! If you’ve ever snapped a picture and thought, “Why does this not look like what I envisioned?” — chances are, it’s the lighting. Let’s dive into how mastering photography lighting can elevate your shots from basic to breathtaking.
Why Lighting Is Everything in Photography
Lighting isn’t just a part of photography — it is photography. The word “photography” literally means “drawing with light.” That’s why lighting is the most crucial element in any shot. It affects the mood, texture, depth, and clarity of your image.
Types of Photography Lighting
Natural Lighting
Golden Hour
My absolute favorite time to shoot! Golden hour is that sweet spot right after sunrise or just before sunset when the light is soft, warm, and flattering. It’s perfect for portraits, landscapes, or pretty much anything.
Why it works: The low angle of the sun casts long, soft shadows and a golden hue — no harsh highlights here.
Midday Sun
Midday sun can be harsh, but that doesn’t mean it’s unusable. You just have to work with it.
Tip: Use open shade (like under a tree or next to a building) or a diffuser to soften the hard shadows and avoid squinty faces.
Artificial Lighting
Continuous Lighting
This type of lighting stays on — like a lamp or LED panel. Great for learning because you can see how light affects your subject in real-time.
Best for: Video shoots, product photography, or beginners getting a feel for light shaping.
Flash Lighting
Flash lighting is powerful, portable, and precise. It can freeze motion and fill in dark areas — but it takes some practice.
Pro tip: Don’t aim the flash directly at your subject. Bounce it off a ceiling or wall to create softer shadows.
The Three-Point Lighting Setup
Key Light
This is your main light source — the star of the show. It creates the dominant illumination and sets the tone of your shot.
Placement: Usually positioned at a 45-degree angle to your subject.
Fill Light
The fill light’s job is to reduce shadows caused by the key light without creating new ones.
Tip: Make this light softer and dimmer than the key. You can use a reflector or a lower-powered light.
Back Light (or Rim Light)
This light separates your subject from the background and adds depth.
Also known as: Hair light, kicker light, or rim light — it highlights edges and makes images pop.
Modifying Light: How to Shape It Like a Pro
Reflectors
Simple and affordable, reflectors bounce light back onto your subject. White gives soft light, silver brightens, and gold adds warmth.
Quick hack: A piece of white foam board works great as a DIY reflector!
Diffusers
These soften harsh light, especially from the sun or strong bulbs. They’re perfect for reducing shadows in portraits.
On a budget? Use a sheer white curtain or a translucent shower curtain.
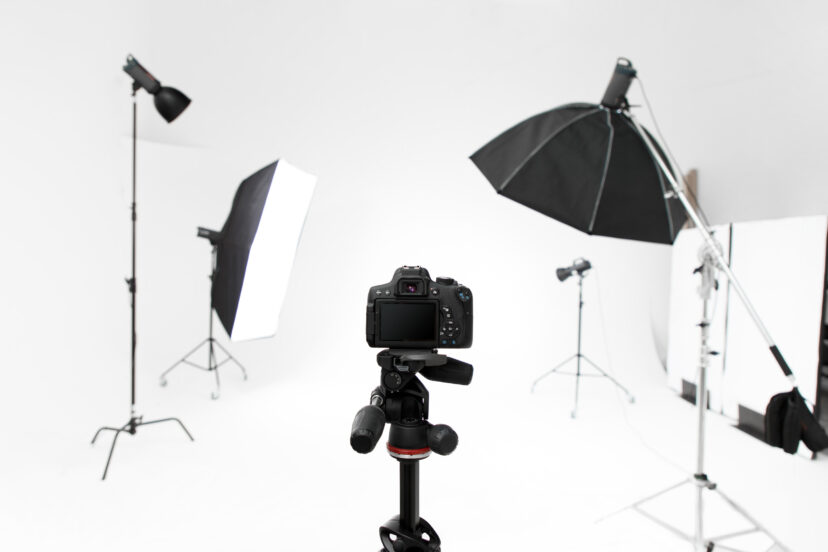
Softboxes
Softboxes give you that buttery soft, directional light that’s perfect for portraits and products.
Bonus: They reduce harsh shadows and create even lighting. Think of it like turning a spotlight into a glowing cloud.
>>> See full range and prices of photography lighting HERE <<<
Lighting Techniques for Different Genres
Portrait Photography
You want flattering, soft light for faces. Golden hour or window light with a reflector works wonders.
Pro trick: Use Rembrandt lighting — a triangle of light on the cheek opposite your light source.
Product Photography
Here, clarity and detail are key. Use softboxes and light tents to eliminate shadows and make products pop.
Consistency is everything for e-commerce or catalog shoots.
Landscape Photography
Timing is everything. Early morning and late evening give the most dramatic natural lighting.
Tip: Use side lighting to reveal textures — like the rough bark of a tree or ripples on water.
Common Lighting Mistakes to Avoid
- Overexposing highlights (white skies, anyone?)
- Mixing color temperatures (yellow and blue tones together? No thanks.)
- Flat lighting (no shadows = no depth)
Tips to Improve Your Photography Lighting
- Move your light around — even small changes can drastically alter your image.
- Learn to see light — observe shadows, highlights, reflections wherever you go.
- Use lighting apps — like Sun Surveyor or Golden Hour to plan your natural light shoots.
- Practice with one light first — mastering one is better than juggling many badly.
Conclusion
Lighting is the backbone of every great photo. Whether you’re working with sunlight, studio strobes, or a simple desk lamp, understanding how to control, shape, and modify light will unlock endless creative possibilities.
So next time you pick up your camera, don’t just look at your subject — look at the light. Trust me, it’ll change everything.
>>> See full range and prices of photography lighting HERE <<<
FAQs
Q1: What’s the best lighting for beginners in photography?
Start with natural light, especially window light. It’s soft, flattering, and helps you understand light direction and intensity.
Q2: Should I buy a ring light or softbox?
It depends! Ring lights are great for vlogs and close-up portraits. Softboxes offer more versatile and natural-looking lighting for general photography.
Q3: How do I fix harsh shadows in my portraits?
Use a reflector or a fill light to bounce light into the shadows. You can also reposition your subject or use a diffuser.
Q4: What’s the difference between hard and soft light?
Hard light creates sharp shadows and contrast (like direct sun). Soft light spreads more evenly and minimizes shadows (like an overcast day).
Q5: Can I mix natural and artificial light in a photo?
Yes, but match the color temperature (Kelvin) as closely as possible, or correct it in post-processing to avoid weird color casts.
Further reading
Check out our other relevant articles:
Art of Portrait Photography: Master Techniques for Stunning Shots
Golden Hour Photography: Mastering Nature’s Most Magical Light
Here are two educational resources that delve deeper into photography lighting techniques, complementing the insights shared in the article:
-
CreativeLive: Photography Lighting for Beginners
This comprehensive guide covers foundational lighting concepts, including natural light utilization, understanding light direction and quality, and practical tips for beginners to enhance their photography skills. -
Photography Life: Photography Lighting Setups Explained
This article provides an in-depth exploration of various lighting setups, from modifying natural light to implementing artificial lighting techniques. It offers practical advice for photographers aiming to master different lighting scenarios.
Feel free to explore these resources to further enhance your understanding and application of photography lighting techniques.
.