Off-Camera Flash Basics: When and How to Use External Lighting

Learn when and how to use off-camera flash for professional portraits.
If you’ve ever admired portraits with crisp subject lighting, soft shadows, and beautiful separation from the background, there’s a good chance off-camera flash played a role. When I first began using external lighting, I was amazed at how much control it gave me—suddenly I wasn’t relying on unpredictable sunlight anymore.
Let me walk you through the fundamentals so you can start incorporating off-camera flash with confidence.
Why Off-Camera Flash Matters
Off-camera flash gives you control over direction, intensity, and quality of light—things natural light doesn’t always offer.
Natural Light vs. Flash: What’s the Difference?
Natural light is gorgeous but inconsistent. Flash, on the other hand, is precision lighting that you shape exactly how you want.

When used correctly, off-camera flash blends with ambient light so naturally that it’s almost invisible.
Essential Gear for Off-Camera Flash
Before diving into techniques, you’ll need the right tools.
Speedlights vs. Strobes
Flash units fall into two major categories.
Pros and Cons of Each
Speedlights
✔ Lightweight & portable
✔ Battery-powered
✔ Great for beginners
✘ Less powerful
Strobes
✔ Strong output
✔ Faster recycle times
✔ Ideal for bright outdoor work
✘ Heavier and pricier

Light Stands, Triggers & Modifiers
You’ll also need a wireless trigger, a stand, and the right modifier.
Softboxes, Umbrellas & Grids
-
Softboxes: Soft, controlled light
-
Umbrellas: Broad, easy light
-
Grids: Tight, directional lighting
Modifiers shape the mood of your portrait dramatically.
Understanding Flash Power and Settings
Once you know the gear, the next step is learning how flash behaves.
Flash Power Explained
Flash power is measured in fractional increments: 1/1 (full), 1/2, 1/4, etc.
Each step is one stop of light. Lower numbers give softer light.
Sync Speed and High-Speed Sync (HSS)
Your camera has a maximum shutter speed that works with flash—usually 1/160 to 1/250 sec.
HSS allows you to shoot at 1/1000 sec or faster, perfect for bright outdoor portraits.


Manual vs. TTL Flash Modes
TTL acts like “auto mode” for flash—it measures light automatically.
Manual flash gives consistent output from shot to shot.
I personally use TTL for moving subjects and manual for controlled portraits.
When to Use Off-Camera Flash
Flash isn’t only for dark environments—it’s useful in broad daylight too.
Overpowering the Sun
Off-camera flash lets you expose the background properly while keeping the subject bright.


Creating Dramatic Portraits
Hard shadows and directional light create cinematic images.
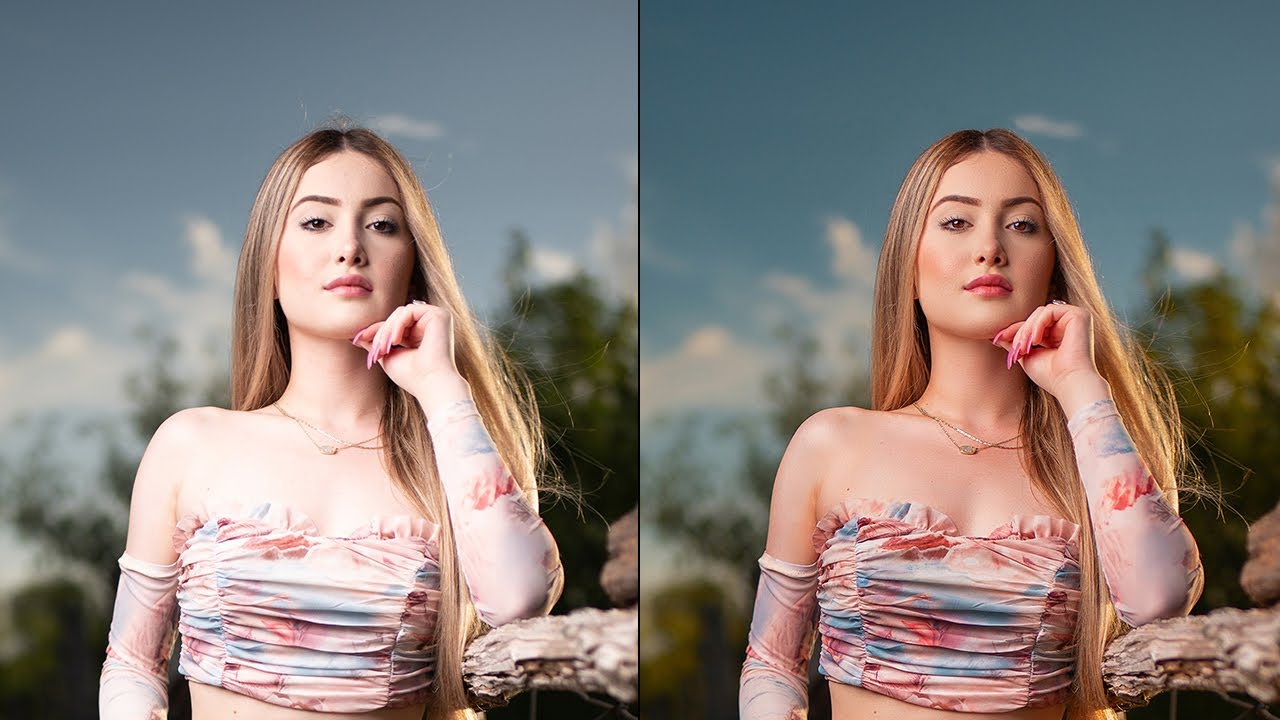
Filling Shadows for Even Skin Tones
Sometimes natural light creates under-eye shadows—off-camera flash fixes that immediately.
Indoor Portrait Scenarios
Small spaces, dim rooms, and mixed lighting all improve with controlled flash.
How to Position and Use Off-Camera Flash
Light placement changes everything about your portrait’s mood.
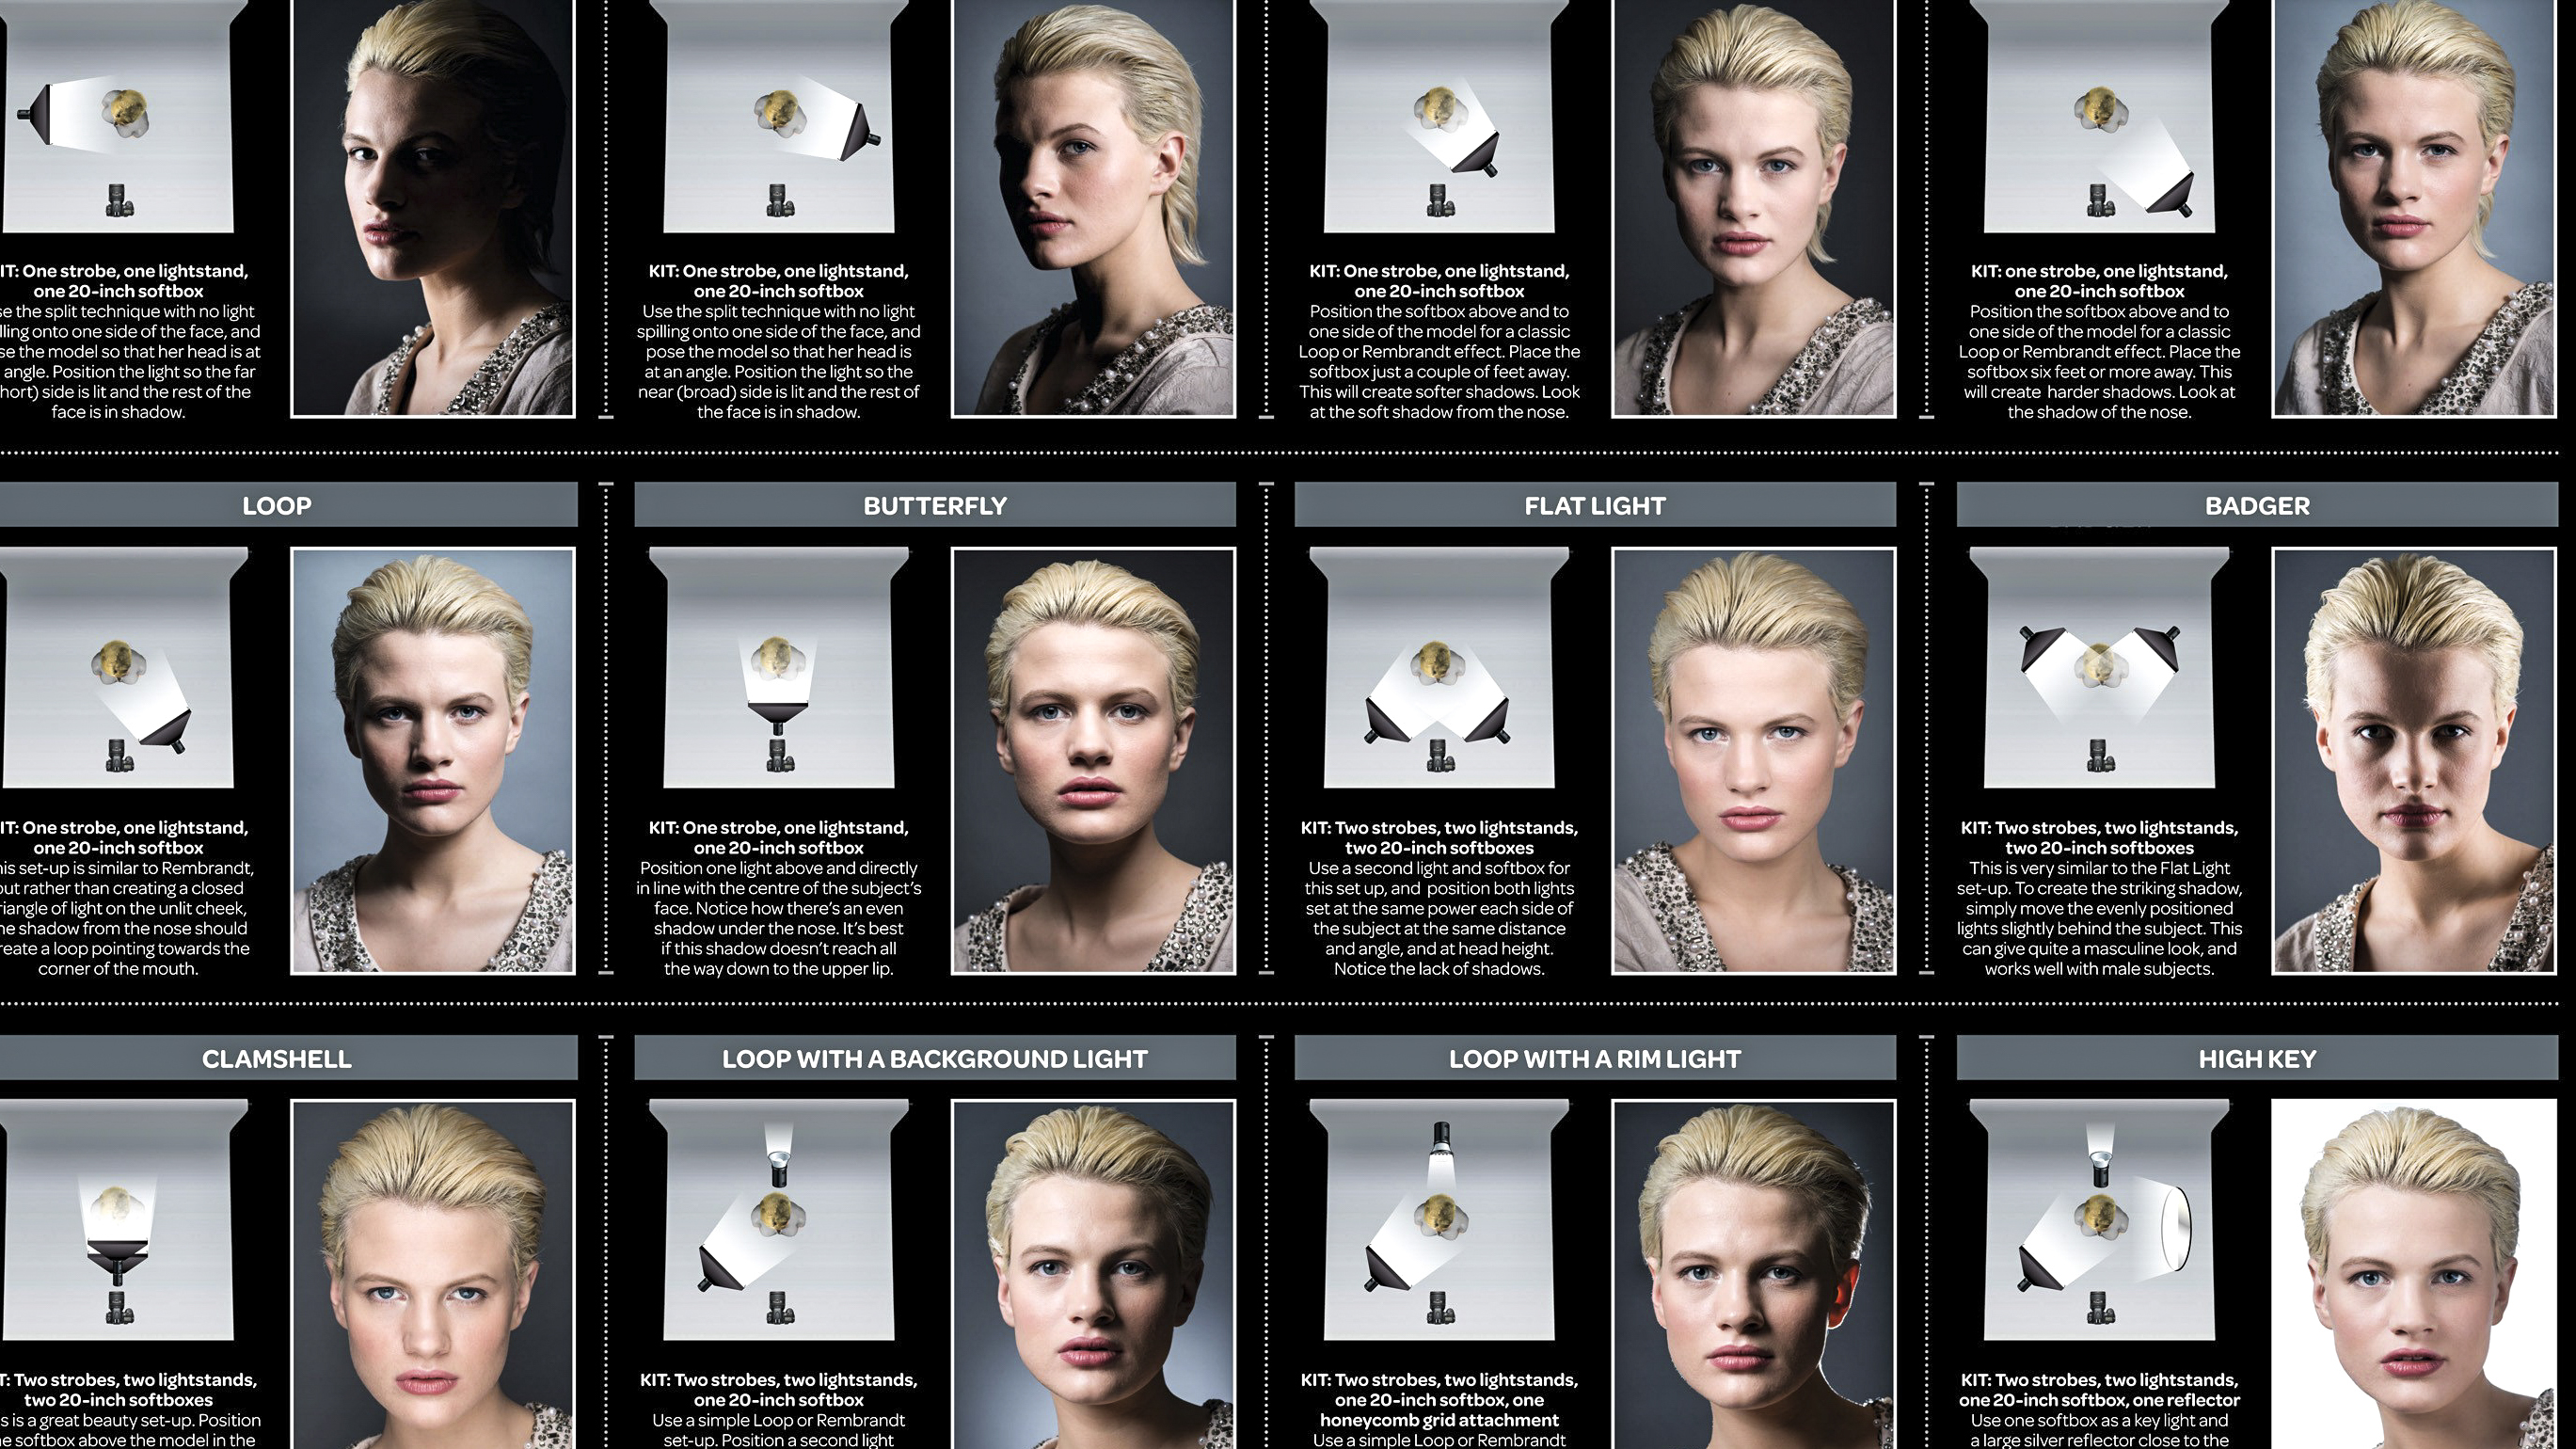
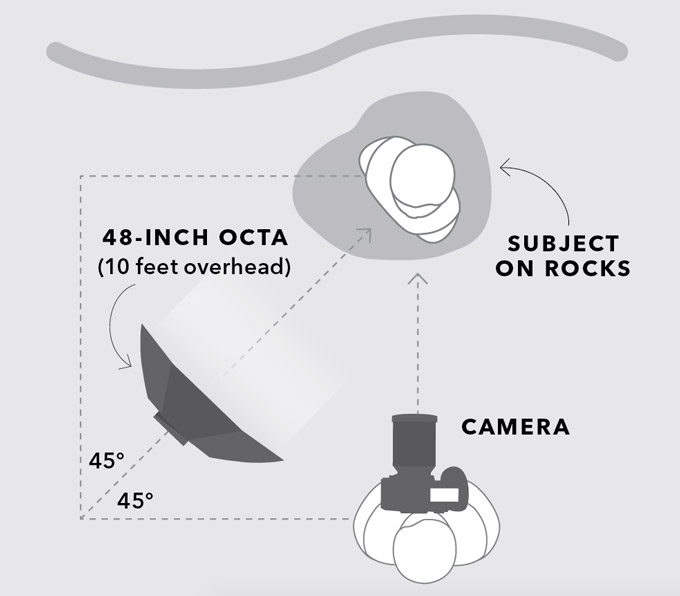
45-Degree Lighting Technique
This classic setup puts the flash slightly above eye level and 45° off to the side.
It creates flattering shadows that sculpt the face.

Backlighting With Flash
Place the flash behind your subject for a gorgeous rim light that adds dimension.
Two-Light Setups for Advanced Portraits
A key light + fill light setup offers studio-quality results outdoors.
Balancing Flash With Ambient Light
Good flash photography is really good ambient balance.
The Exposure Triangle for Flash Photography
Here’s the breakdown:
-
Shutter speed controls ambient light
-
Aperture controls flash brightness
-
ISO affects both
This is the secret to making your flash look natural—not artificial.
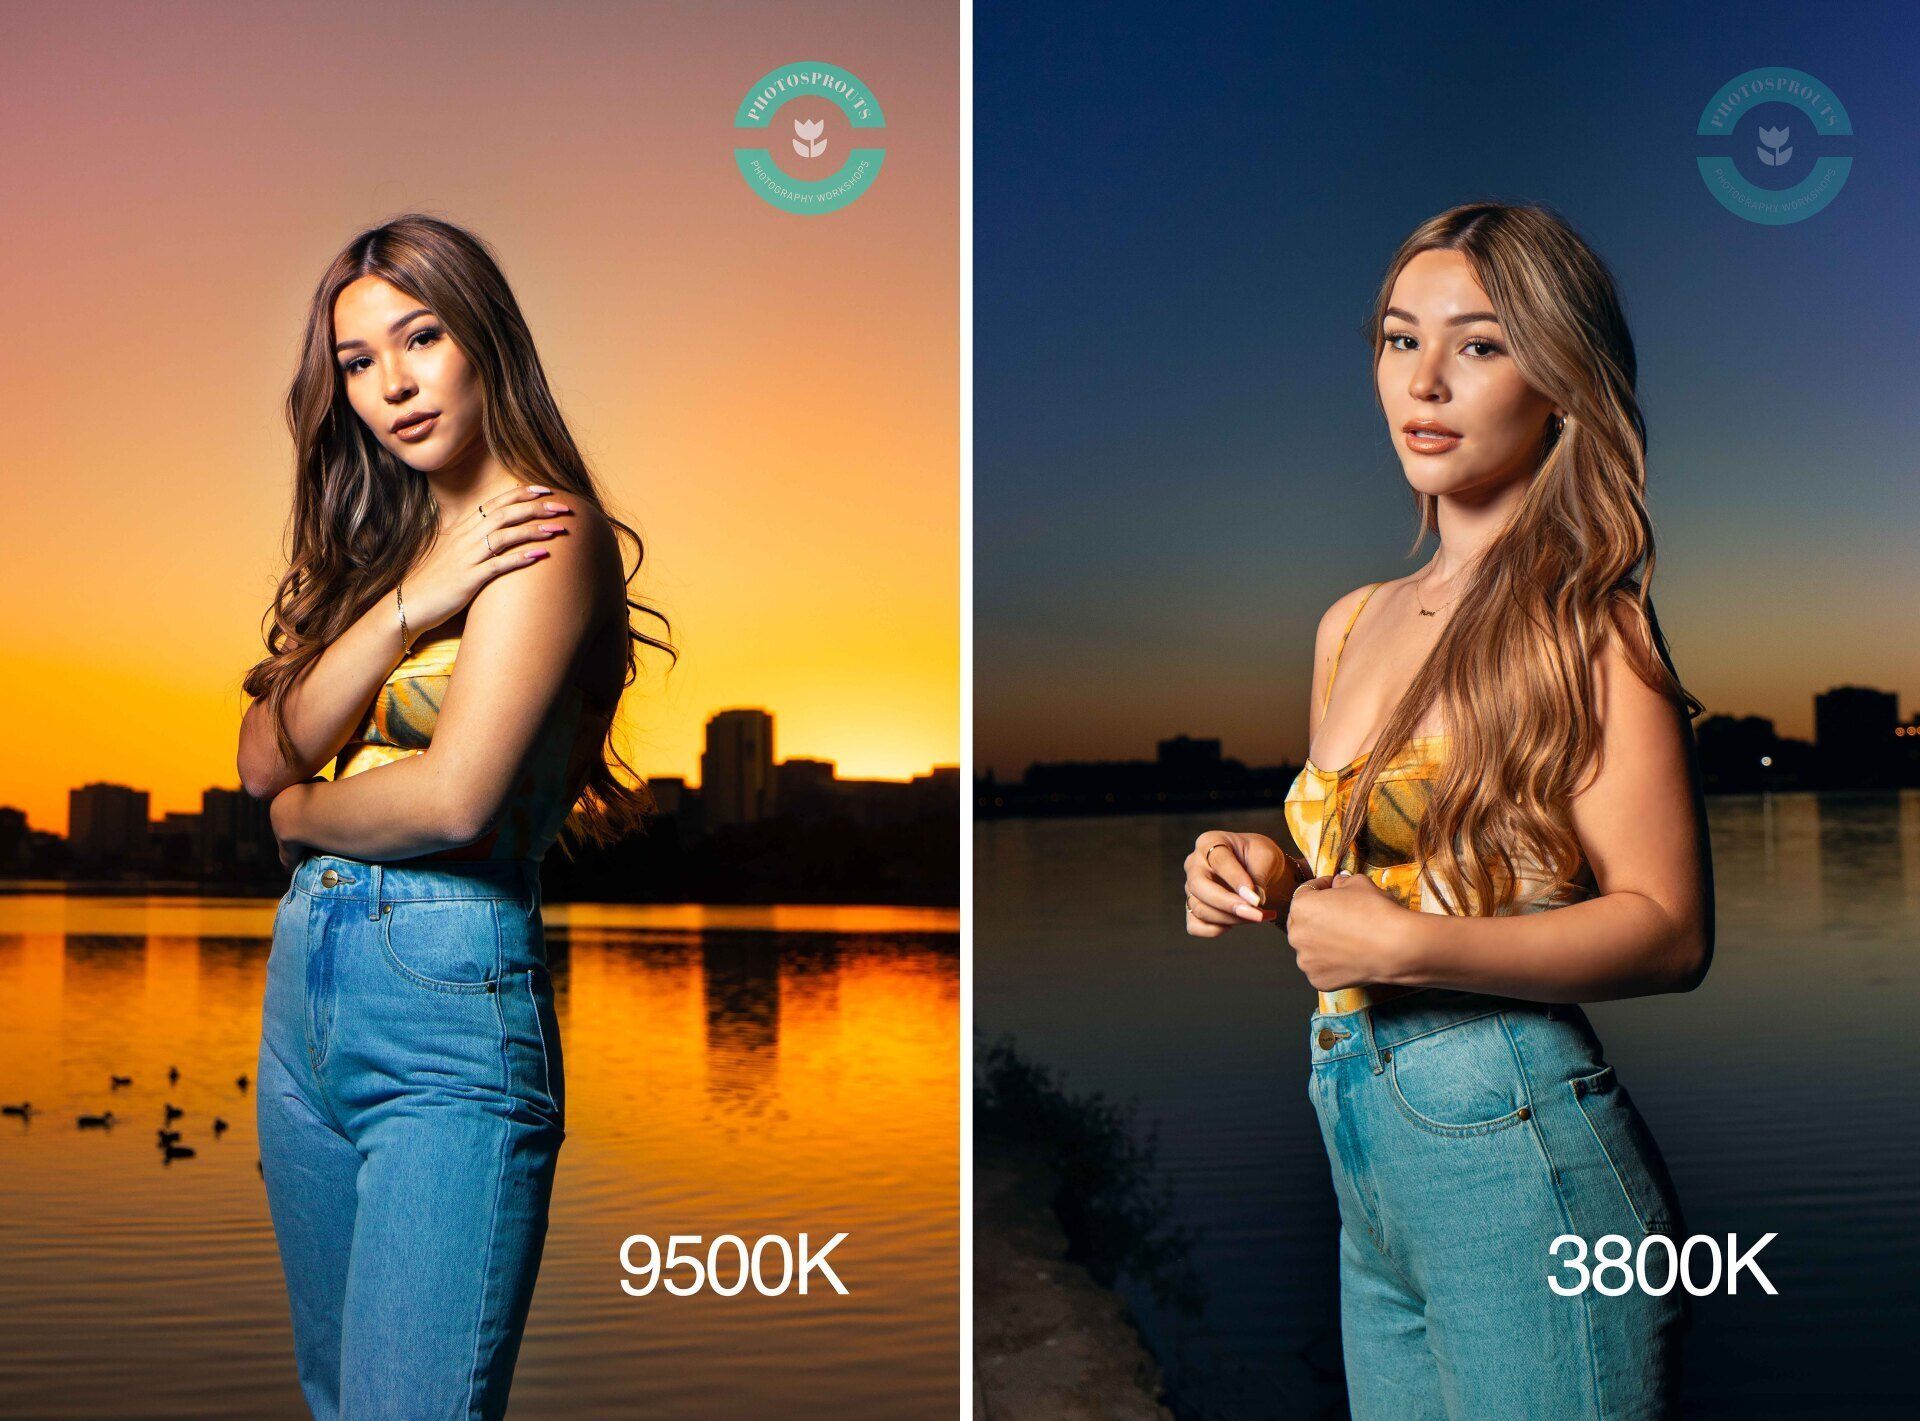
Matching Color Temperatures
Use CTO gels to warm flash for sunset scenes or to match tungsten lights indoors.

My Step-by-Step Workflow for Using Off-Camera Flash
Real Setup Example
Here’s how I set up a typical outdoor portrait:
-
Expose background first
-
Add flash at 1/16 power
-
Position flash 45° to subject
-
Add softbox for smooth diffusion
-
Adjust flash power to taste
This workflow keeps my results consistent every time.
Troubleshooting Common Flash Problems
Every photographer hits these challenges at some point.
Harsh Shadows
Use larger modifiers or bring the light closer.
Incorrect Exposure
If the subject is too bright, lower flash power or close the aperture.
Flash Misfires
Check battery level, trigger channels, and make sure the flash is in the correct mode.
Conclusion
Off-camera flash opens the door to professional-level portrait lighting regardless of where you’re shooting. Once you understand flash power, positioning, and how to balance it with ambient light, you’ll gain full creative control over your photography.
Master these fundamentals, and you’ll learn when and how to use off-camera flash for professional portraits in any environment.
FAQs
1. Do I need expensive gear to start with off-camera flash?
No—an affordable speedlight and trigger are enough for beginners.
2. Should I use TTL or manual flash for portraits?
Manual gives consistent results, but TTL is helpful for fast-paced shoots.
3. What’s the best light modifier for outdoor portraits?
A small softbox provides beautiful, controlled light.
4. Can off-camera flash be used at midday?
Absolutely—flash helps overpower harsh sunlight.
5. How far should I place the flash from my subject?
Typically 2–4 feet for soft light, depending on the modifier.
Further photo tips here:
https://phototipsgalore.com/detachable-camera-flash/ https://phototipsgalore.com/flash-photography/ https://phototipsgalore.com/beginners-guide-to-flash-photography/ https://phototipsgalore.com/how-to-shoot-stunning-black-and-white-portraits/ https://phototipsgalore.com/10-essential-camera-accessories-for-beginners/


