Macro Photography Tips for Beginners
Welcome to the up-close world of macro photography! If you’ve ever wanted to capture the tiniest details in flowers, insects, or everyday objects, you’re in the right place. As someone who’s been exploring this genre for years, I’ll walk you through the best beginner macro photography tips with DSLR gear, mindset, and techniques that will get you sharper, more stunning results—without the tech overwhelm.
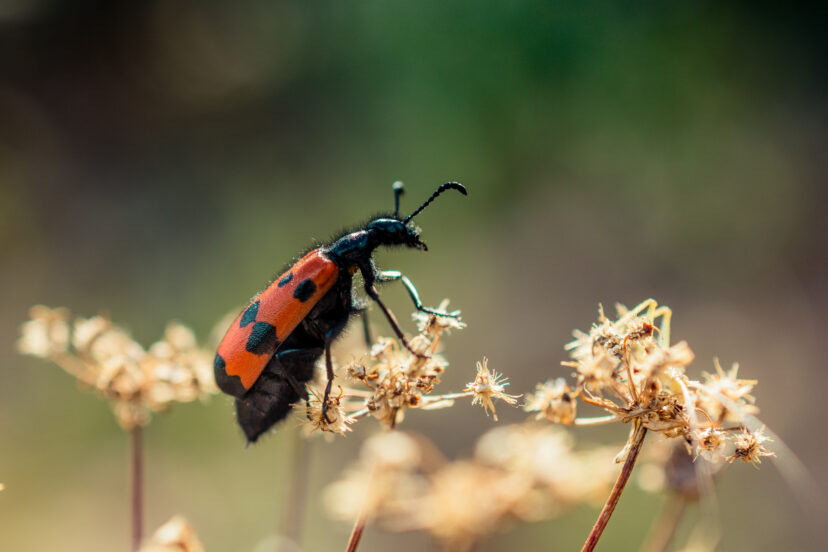
Why Macro Photography is So Captivating
Have you ever zoomed in on a bee and noticed the fuzzy detail on its legs? Or how a dewdrop reflects the whole garden like a fish-eye lens? Macro photography is like a magnifying glass for your camera—pulling you into a miniature world full of surprises and hidden textures.
Understanding the Gear You Need
Camera Body Considerations
Most DSLR cameras, whether you’re using Canon, Nikon, or Sony, are perfectly capable of shooting macro. What matters more than the brand is having features like Live View, good manual focus control, and the ability to shoot in RAW.
Choosing the Right Macro Lens
For true macro photography, you want a lens that offers 1:1 magnification. That means your subject appears life-sized on the camera sensor.
-
Best Focal Lengths for Beginners: 90mm to 105mm lenses are super versatile for macro, especially when photographing insects or small flowers.
-
Budget Tip: Don’t want to splurge just yet? Try extension tubes or close-up filters to get macro results using your existing lenses.
Prime vs. Zoom Macro Lenses
Prime macro lenses tend to be sharper and have wider apertures, making them ideal for beginners. Zoom lenses rarely offer true 1:1 magnification, so go with a prime if possible.
Extension Tubes & Close-Up Filters
Both options are perfect for testing macro on a budget. They reduce the focusing distance of your lens and let you experiment before buying a dedicated macro lens.
Achieving Sharp Focus in Macro
Manual vs Autofocus
At macro distances, autofocus tends to hunt or miss the subject altogether. Switching to manual focus gives you precision. Use Live View and zoom in digitally to nail the focus point.
Using Live View and Focus Peaking
If your DSLR supports it, focus peaking is a lifesaver. It highlights the parts of the image in focus, making it much easier to adjust in real-time.
Mastering Depth of Field
Aperture Choices for Macro
When you shoot macro, depth of field becomes incredibly shallow. A slight shift in focus, and your subject’s eyes are sharp—but the nose is blurred.
-
Best Apertures: Start with f/8 to f/11 for a good balance of sharpness and depth.
-
Avoid f/22+ unless you’re stacking, since it may soften images due to diffraction.
Focus Stacking Basics
Focus stacking involves taking several shots at different focus distances, then merging them in software (like Photoshop or Helicon Focus). It gives you a fully sharp image from front to back—ideal for flowers, bugs, or still-life.
>>> See full range of macro lenses for DSLRs HERE <<<
Lighting Techniques for Macro
Natural Light vs Flash
Soft, diffused light is your best friend in macro photography. Early morning light works great. But if you’re indoors or want more control, try:
-
Ring flashes or twin macro flashes for even lighting.
-
Off-camera speedlights with a diffuser for shadows and depth.
Diffusers and Reflectors
DIY a diffuser with tracing paper or use a small 5-in-1 reflector to fill in shadows. Great for flower shots and shiny surfaces.
Stabilization: Tripods and Rigs
Shooting handheld at macro level is like trying to balance a marble on a pin. Even your heartbeat causes motion blur. Use:
-
Mini tripod or tabletop tripod
-
Macro focusing rail for precise distance adjustments
-
Remote shutter release or 2-second timer to eliminate shake
Composition Tips for Close-Ups
Background Control
Messy or distracting backgrounds kill macro shots. Aim for:
-
Clean, uniform backdrops (paper, foam board)
-
Natural bokeh with distant backgrounds
Leading Lines & Patterns
Petal veins, insect antennae, or shell spirals can create compelling leading lines. Use these to draw attention to your subject’s key details.
Shooting Outdoors vs Indoors
Managing Wind and Movement
Wind is your enemy in macro! A slight breeze will blur your subject.
-
Shoot early morning when it’s calm
-
Use wind blockers like cardboard or jackets
-
Use fast shutter speeds with a bit more ISO
Indoor Setups and DIY Macro Studio
Create your own tiny studio:
-
Foam board as background
-
Desk lamp with tracing paper for soft light
-
Tripod, remote shutter, and your DSLR
Post-Production for Macro Images
RAW Editing Essentials
Always shoot in RAW. In post:
-
Adjust white balance and exposure
-
Add clarity to enhance textures
-
Sharpen only selective areas (like insect eyes)
Focus Stacking Workflow
Tools like Photoshop or Helicon Focus let you blend images into one perfectly sharp photo. Start with 5–10 frames taken at small focus shifts.
Common Mistakes Beginners Make
-
Shooting wide open (f/2.8)—only the eyelashes are sharp
-
Relying too much on autofocus
-
Using slow shutter speeds without stabilization
-
Cluttered or distracting backgrounds
-
Overediting—macro needs finesse, not filters
Practice Exercises to Improve Macro Skills
-
10-shot aperture test on a flower—compare results at f/4, f/8, f/16
-
Focus stack a bug or textured object using manual focus
-
Try a single light source and see how shadows change
-
Photograph 3 different textures (leaf, wood, metal) and study lighting
-
Use one subject and shoot it from five unique angles
>>> See full range of macro lenses for DSLRs HERE <<<
Wrapping Up & Where to Go Next
Macro photography is one of the most rewarding genres out there. It forces you to slow down, observe the minute, and appreciate nature’s design. Whether you’re photographing dew on leaves or the hairs on a caterpillar, your DSLR is your microscope to a hidden world.
Start small. Get close. And most of all—stay curious.
FAQs
1. Do I need a dedicated macro lens to start?
Not right away! Try extension tubes or close-up filters before investing in a true macro lens.
2. What’s the best shutter speed for handheld macro?
Start with 1/250s or faster. Use image stabilization if available—or go with a tripod.
3. Why are my macro photos blurry?
Likely due to camera shake, shallow depth of field, or missed focus. Try manual focus and stabilization.
4. What’s better for macro—natural or flash lighting?
Both work! Natural light gives soft tones; flash gives control. Try both to see what fits your subject.
5. Can I use my phone for macro photography?
Absolutely. Clip-on macro lenses for smartphones can get surprisingly sharp results for fun close-ups.
See other relevant articles:
Macro Photography: A Beginner’s Guide to Capturing Tiny Wonders
.


