Long Exposure Photography: Step‑by‑Step Guide
Why I Love Long Exposure for Waterfalls
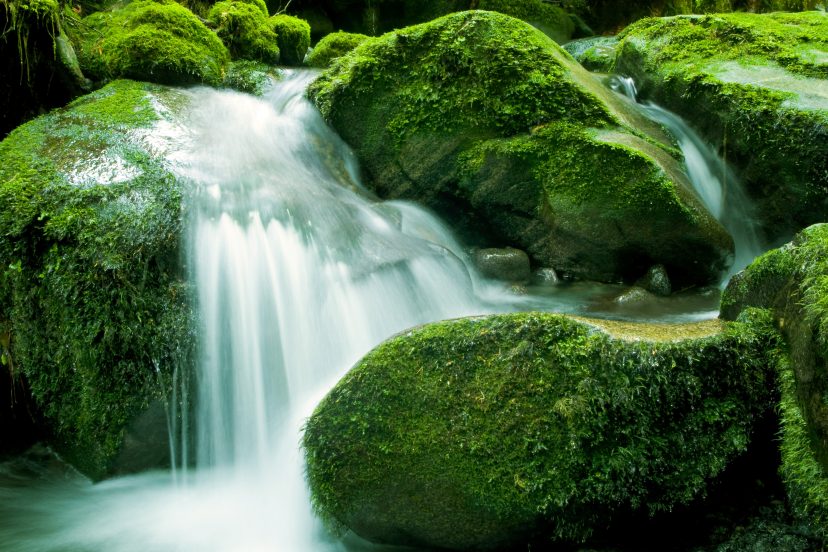
When I discovered long exposure photography, especially for waterfalls, it felt like unlocking magic. Suddenly, rushing water transforms into silky streams of light—dreamlike and ethereal. If you’re curious about long exposure camera settings for waterfalls, you’re in exactly the right spot. I’ll show you gear, settings, and techniques that create stunning waterfall shots, no guessing required.
Essential Gear & Setup
Tripod Importance
A tripod is non-negotiable. Any movement during your long exposure will ruin that silky water effect and blur the entire scene. A sturdy tripod keeps your frame rock solid. As one expert put it, “stability is paramount” when shutter speeds dip below about 1/50 s
Neutral Density Filters
Even on a cloudy day, an ND filter is like sunglasses for your camera. It blocks light allowing slower shutter speeds without overexposing your image. For most daylight waterfall work, I use a 6‑ to 10‑stop ND filter—essential for beautiful motion blur
Remote Release or Timer
Pressing the shutter can introduce camera shake—even with a tripod. I either use a remote shutter release or the camera’s built-in 2‑second timer to avoid vibration and preserve sharpness
Long Exposure Camera Settings for Waterfalls
Shutter Speed Choices
-
0.25 s to 2 s: Ideal for capturing flowing texture while retaining some detail.
-
3 to 10 seconds or more: Creates dreamy, almost mist-like effects—especially effective with slower-flowing falls
Aperture Settings
Use a narrow aperture like f/8 to f/16 to maximize depth of field and keep everything—from foreground rocks to distant falls—sharp. This also helps restrict light, allowing longer shutter durations
ISO Selection
Set your ISO to the lowest native value, typically ISO 100. This reduces noise and gives you headroom for slower exposures without overexposing highlights
Manual Focus
Autofocus can struggle in low-light or moving scenes. I switch to manual focus and use Live View to fine-tune focus—especially on static foreground elements or the waterfall itself.
Step‑by‑Step Shooting Workflow
Level and Compose
Mount the camera on your tripod, compose the scene with attention to foreground framing and rule of thirds, and level the horizon.
Meter & Preview
Set your camera to manual mode. Set ISO lowest, aperture around f/11, and shutter speed to start around 1 second. Capture a preview shot and review the histogram—you want highlights away from clipping
Adjust & Test
Adjust shutter speed slower or faster based on the preview effect. Try different shutter speeds to see what silky effect matches your vision. Tweak aperture or add ND filters as necessary.
Handling Different Lighting Conditions
Overcast or Low Light
Cloudy skies are actually perfect—they diffuse harsh light. Often you don’t need ND filters in low-light, and you can go long with lighter settings.
Bright Sunlight with ND
Direct midday sun can overexpose the scene. Use your ND filter and calculate exposure carefully, adjusting aperture or ISO to balance light.
>>> Buy DSLR camera kits HERE <<<
Composing Long Exposure Waterfall Shots
Foreground Elements
Include rocks, logs, or branches in the foreground to anchor your shot and enhance depth.
Use Leading Lines
Use the flow of the river or rocks to guide the eye toward the waterfall—creating visual flow in the image.
Avoiding Common Pitfalls
Overexposure
If the water is blown out bright, reduce shutter speed, close aperture further, lower ISO or switch to a stronger ND filter.
Camera Shake
Always use a tripod and timer or remote release. Even the slightest push can ruin a long exposure image.
Bad Focus or Composition
If your image feels off, reassess your focus and framing. Sometimes stepping back or shifting angles gives a more balanced composition.
Advanced Techniques to Elevate Your Shots
Bulb Mode for Extra-Long Exposures
Use Bulb mode for very long shutter speeds beyond typical limits. This mode is essential for exposures over 30 seconds and can be locked using remote release
Polarizer plus ND Filter
Combine a circular polarizer with an ND filter to reduce glare, increase saturation, and allow even longer exposures without sacrificing contrast.
Editing Your Waterfall Photos
Exposure & White Balance
In post, slightly lower highlights and push up shadows if needed. Adjust white balance—cooler for moody falls, warmer if you want golden-hour warmth.
Sharpening and Noise Reduction
Apply minimal sharpening and noise reduction to retain a natural, soft look in the water areas while keeping details crisp in rocks and textures.
Practice Drills to Build Skill
Find a local waterfall or flowing creek. Shoot multiple shots varying only shutter speed, keeping aperture and ISO constant. Review how each setting changes the look—silky vs. textured. Repeat until you find your style.
Final Thoughts on Long Exposure
Mastering long exposure camera settings for waterfalls isn’t just technical—it’s about patience, creativity, and experimentation. With a tripod, ND filters, and a willingness to test, you’ll be creating magical waterfall images in no time. Every waterfall has its own character; by mastering these steps, you’ll bring out its personality in every frame.
>>> Buy DSLR camera kits HERE <<<
Frequently Asked Questions
Q1: What shutter speed should I start with for waterfalls?
Begin around 1 second, then adjust longer or shorter depending on the flow and desired effect.
Q2: Do I always need a neutral density filter?
Not always—on overcast days or near dusk you may get long exposures without ND. But in daylight, an ND is highly recommended.
Q3: Can I handhold long exposures?
No, unless you’re using active stabilization and very short durations. Always use a tripod to avoid camera shake when exposures exceed ~1/50 s.
Q4: Is manual mode necessary?
Yes. Manual mode allows full control over shutter speed, aperture, and ISO—essential for exploring long exposure creatively.
Q5: How can I avoid blown-out highlights in bright scenes?
Use a stronger ND filter (e.g., 10-stop), increase shutter speed duration wisely, use lower ISO, and preview the histogram for clipping.
Read more relevant posts HERE


