How to Edit Night Photos Without Losing Detail

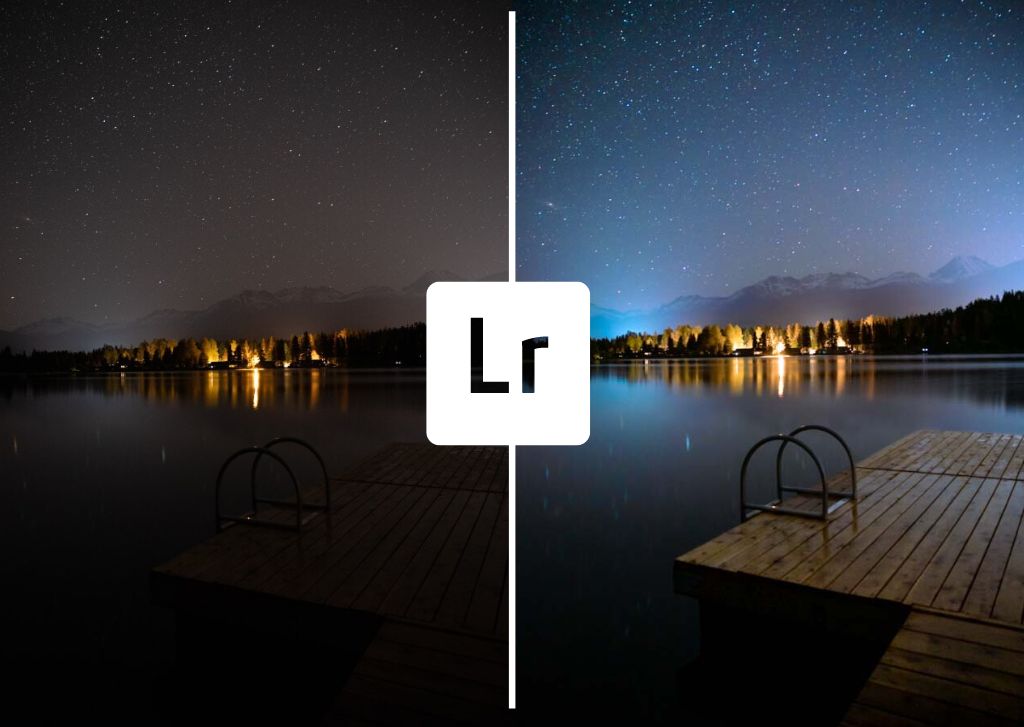
Make night shots pop by balancing exposure and noise in editing. Night photos are magical—but editing them can feel like defusing a bomb. One wrong slider move and suddenly your image is noisy, flat, or glowing like a video game. Over the years, I’ve learned how to make night shots pop by balancing exposure and noise in editing, without sacrificing detail or realism. Let me walk you through exactly how I do it.
Why Night Photo Editing Is Tricky
Night photography pushes cameras to their limits.
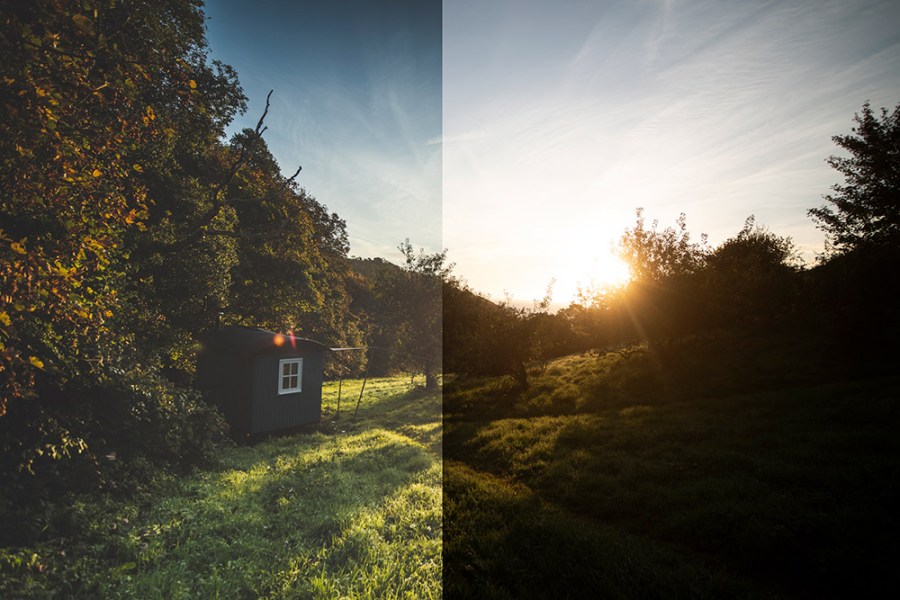
The Dynamic Range Problem
At night, you’re dealing with extreme contrast—bright lights and deep shadows living in the same frame.
Why Cameras Struggle at Night
Sensors hate darkness. To compensate, they boost ISO, which introduces noise and reduces detail.


Start With the Right Mindset Before Editing
Before touching any sliders, I remind myself: night photos are supposed to be dark. Editing isn’t about turning night into day—it’s about revealing what’s already there.
Always Shoot RAW for Night Photography
If you’re serious about night shots, RAW is non-negotiable.
RAW vs JPEG at Night
RAW files preserve far more shadow and highlight detail, giving you room to recover mistakes without destroying the image.

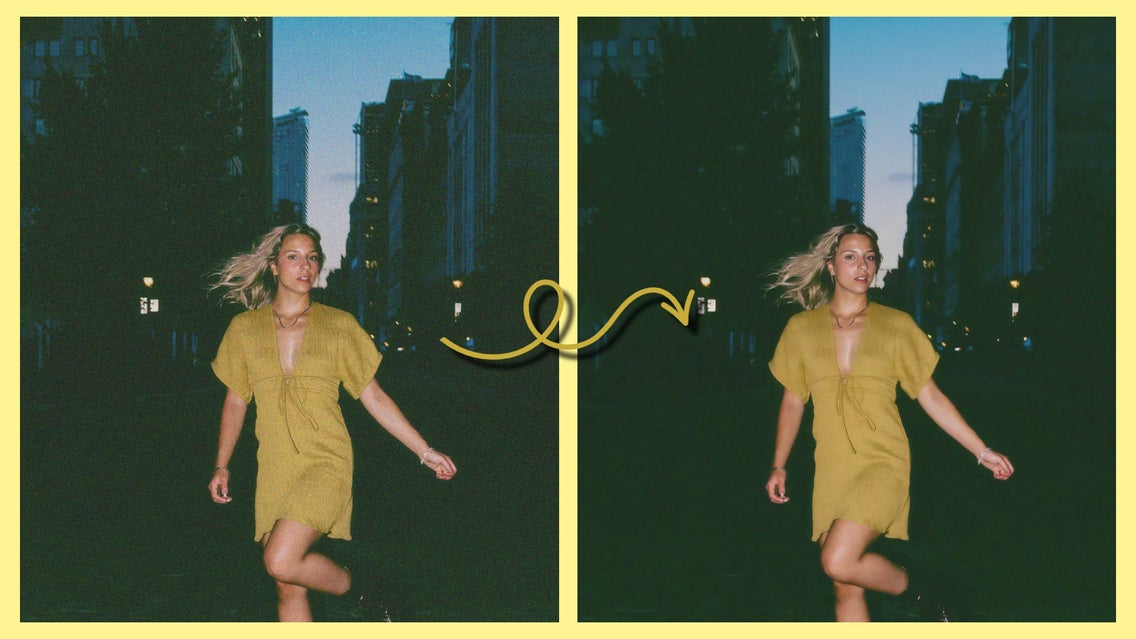
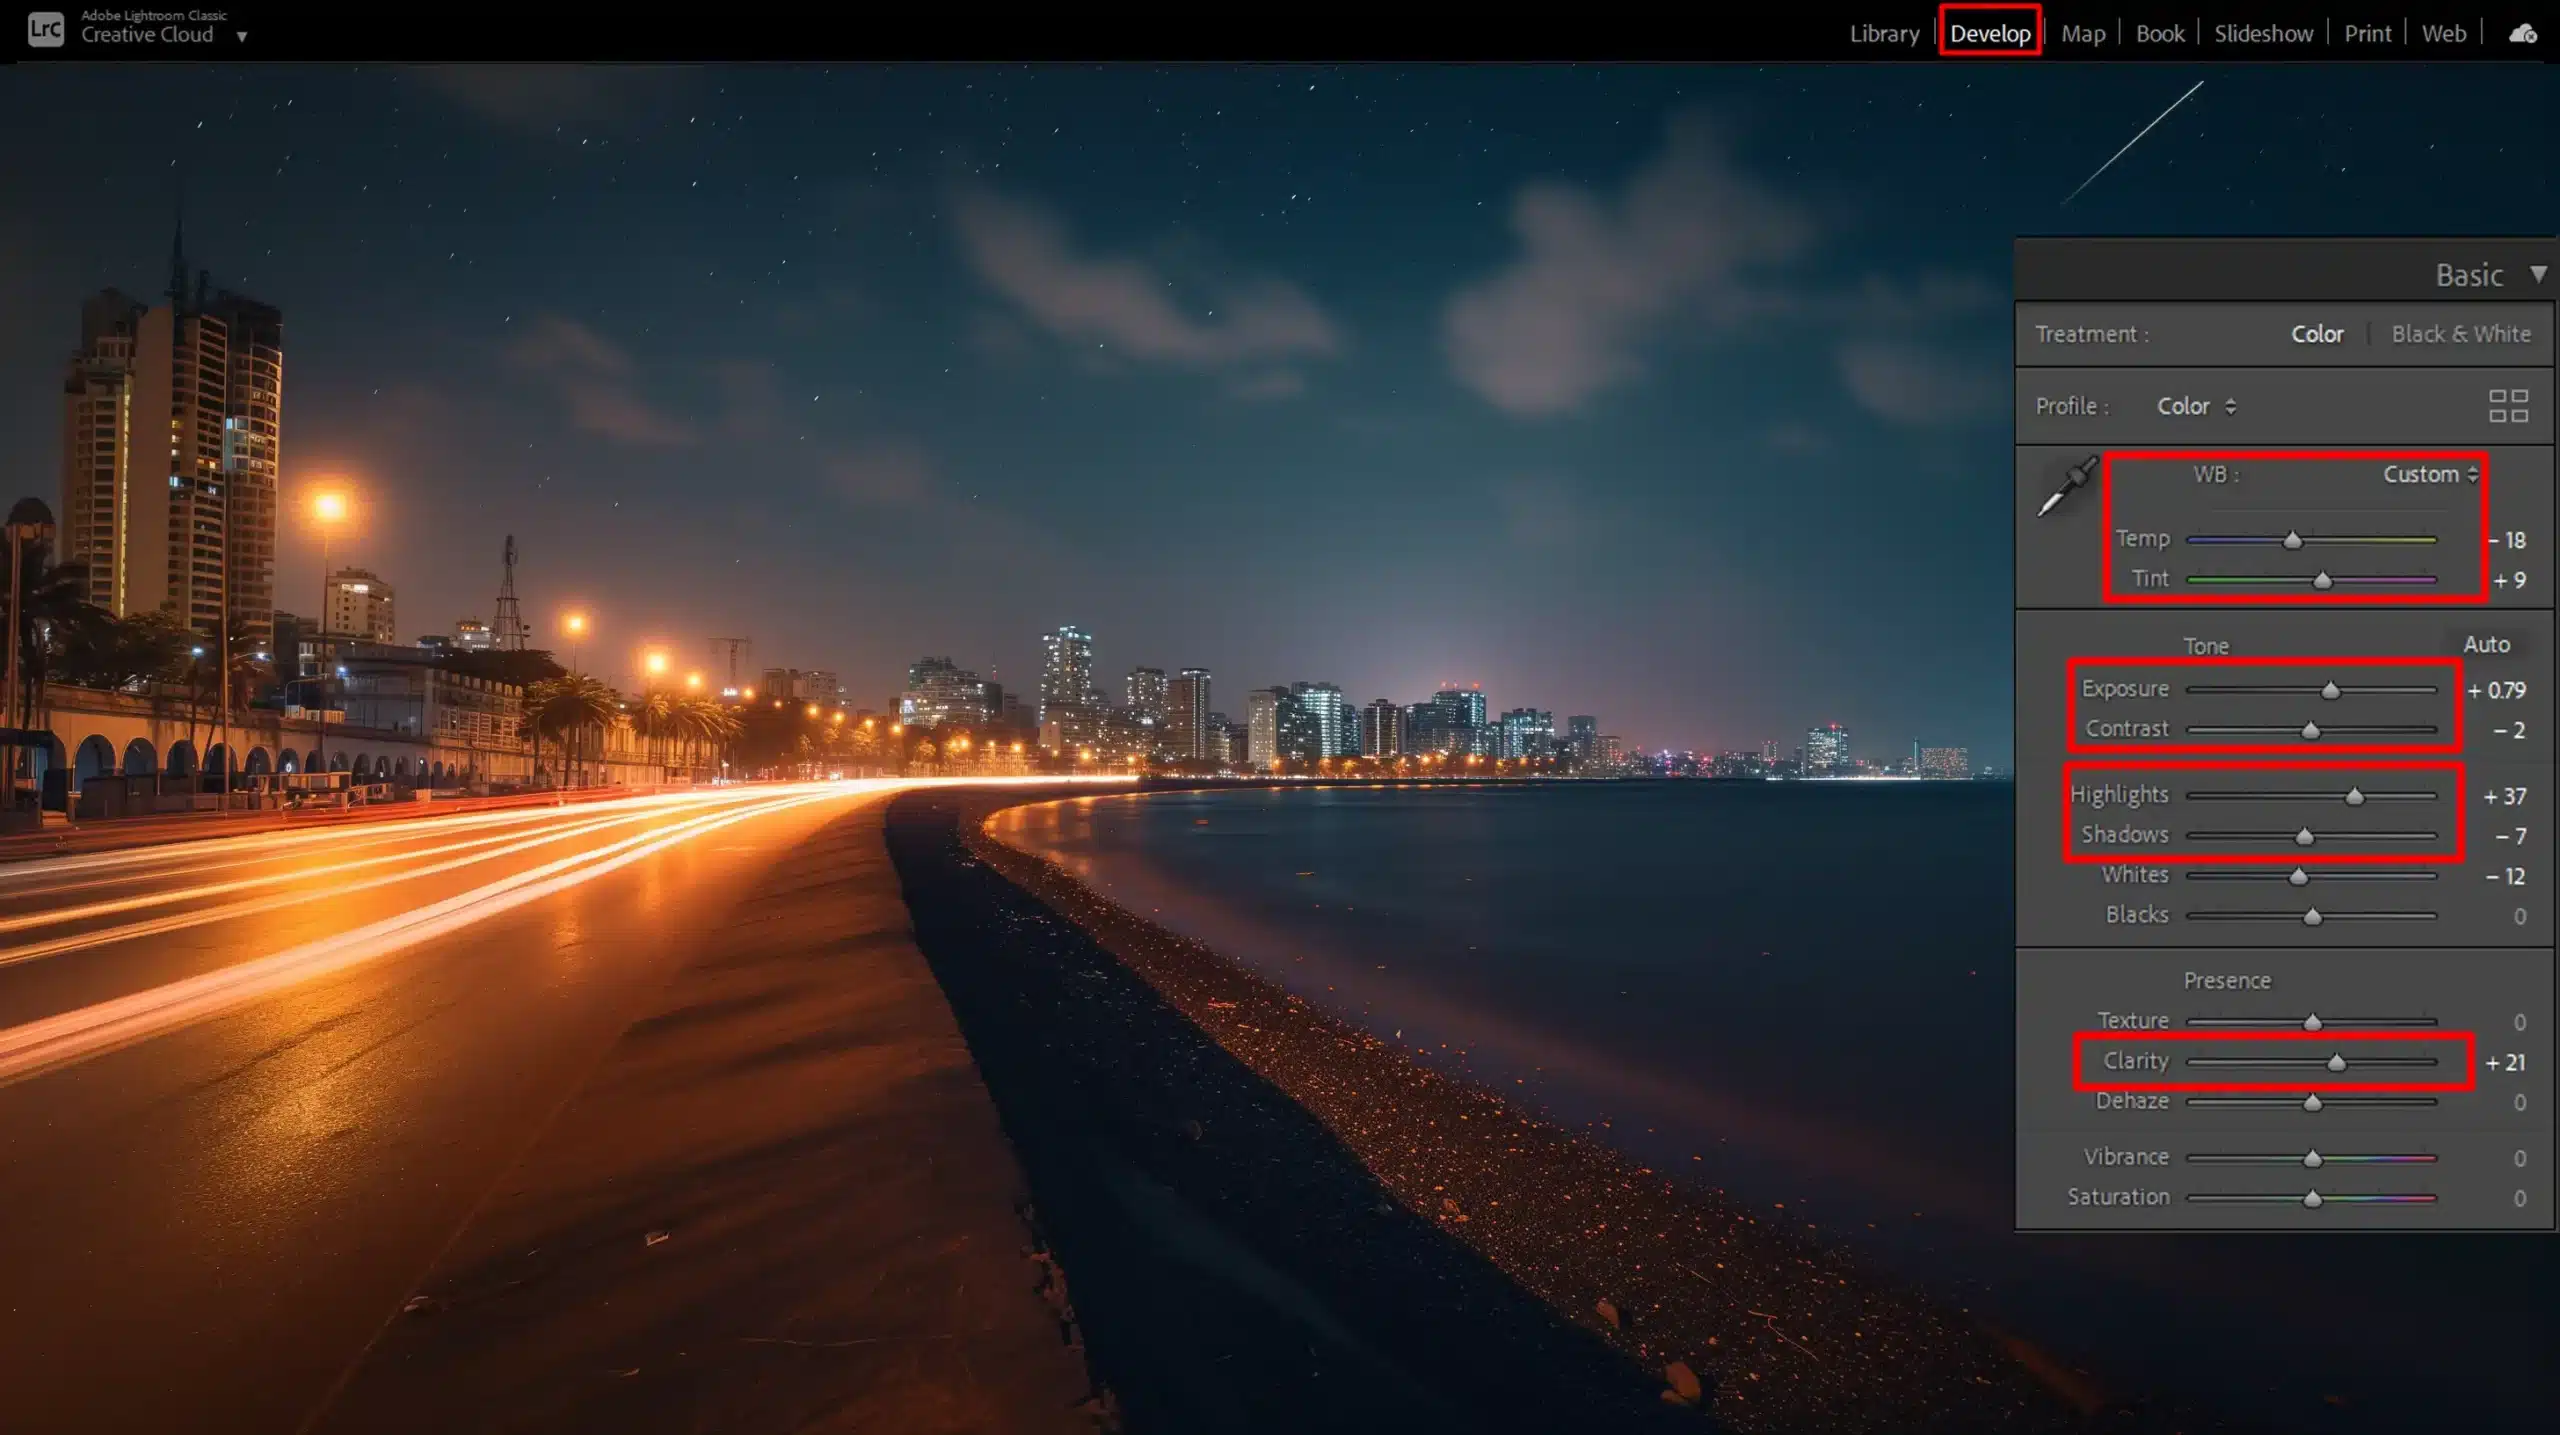
Step One: Fix Exposure Without Crushing Detail
This is where most people go wrong.
Using Exposure vs Shadows
I start with the Exposure slider, but gently. Then I lift Shadows, not Exposure, to reveal dark areas.
Avoiding Over-Brightening
If your blacks turn gray, you’ve gone too far. Night photos should still feel like night.
Step Two: Balance Highlights to Save Light Sources
Streetlights, neon signs, and the moon are detail killers.
Streetlights, Neon, and Moonlight
Pull the Highlights slider down to recover detail without dimming the entire image.


Step Three: Control Noise Without Killing Texture
Noise is unavoidable—but plastic photos are worse.
Luminance Noise Reduction
I increase luminance noise reduction slowly, watching skin, walls, and skies carefully.
Color Noise Reduction
Color noise is easier to remove—don’t be afraid to push this slider more.

The Secret: Noise Reduction vs Sharpening Balance
Here’s the trick most tutorials skip: noise reduction and sharpening must be balanced together. Reduce noise first, then sharpen lightly to restore texture.
Step Four: Use Contrast and Clarity Carefully
Night photos don’t like heavy hands.
Why Less Is More at Night
Too much clarity exaggerates noise. I prefer subtle contrast and a touch of texture instead.


Step Five: Color Grading Night Photos Naturally
Color sets the mood.
White Balance at Night
Auto white balance often fails at night. I manually adjust until whites look neutral—not orange or blue.
Avoiding Unrealistic Colors
If your night sky turns teal or purple, pull back. Subtlety wins.
>>> Telephoto lenses for night photography CLICK HERE <<<
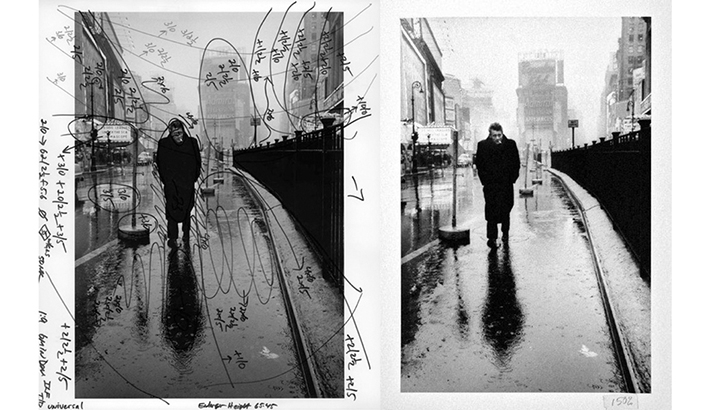
Local Adjustments: The Pro Trick
Global edits only get you halfway.
Dodging and Burning for Night Shots
I brighten subjects slightly and darken backgrounds to guide the viewer’s eye—just like classic darkroom techniques.
Editing Night Photos for Different Genres
Different scenes need different approaches.
Cityscapes
Preserve light detail, reduce noise in skies, and keep colors controlled.
Astrophotography
Noise reduction first, contrast second, stars always sharp.
Low-Light Portraits
Protect skin texture. Grain is better than plastic.

Common Night Editing Mistakes
-
Overexposing shadows
-
Excessive noise reduction
-
Over-saturating colors
-
Too much clarity
If it looks fake, it probably is.
My Step-by-Step Night Editing Workflow
-
Adjust exposure gently
-
Recover highlights
-
Lift shadows carefully
-
Reduce noise
-
Sharpen lightly
-
Color grade subtly
-
Apply local adjustments

Practice Tips to Improve Faster
Edit the same photo multiple ways. Push sliders too far, then pull them back. Experience teaches restraint.
Conclusion
Editing night photos isn’t about brute force—it’s about finesse. When you make night shots pop by balancing exposure and noise in editing, you preserve mood, detail, and realism. Master that balance, and your night images will stand out without screaming for attention.
>>> Telephoto lenses for night photography CLICK HERE <<<
FAQs
1. Why do my night photos look noisy after editing?
Because lifting exposure too much amplifies noise already present.
2. Should I remove all noise from night photos?
No. Some grain is natural and often preferable.
3. What’s the best ISO for night photography?
Use the lowest ISO possible while maintaining sharpness.
4. Can night photos be edited on mobile apps?
Yes, but RAW support is limited compared to desktop editors.
5. How do I know when I’ve edited too much?
If it stops looking like night, you’ve gone too far.
Further photo tips here: