How to Capture the Perfect Sunrise and Sunset Photos
Learn how to shoot breathtaking sunrise & sunset photos with perfect light balance. When I first picked up my camera and chased those early-morning and late-evening skies, I realised one thing: capturing a truly breathtaking sunrise or sunset is more about understanding light and planning than luck.
In this guide, I’m going to walk you through how to capture the perfect sunrise and sunset photos, so you’ll feel confident heading out, camera in hand, ready to nail that golden light.
Understanding the Light Conditions
Light changes dramatically during the day—and around sunrise and sunset it becomes magic. Understanding the light is your first step to mastering this kind of photography.
What is the Golden Hour?
The golden hour is that sweet spot shortly after sunrise, or before sunset, when the daylight is redder and softer than when the sun is higher in the sky.
Because shadows are longer and contrasts gentler, you get beautiful soft light and rich tones. Imagine painting with light instead of just capturing it.
What is the Blue Hour?
Just before sunrise or after sunset, there’s a short period called the blue hour—when the sun is below the horizon and indirect light takes on predominantly blue shades.
This time gives you dramatic skies, subtle light, and a great opportunity for mood-filled shots. Think of it as the quieter counterpart to the golden hour.
Planning Your Shoot
Photography of nature doesn’t tolerate “I’ll just show up and hope.”
Successful sunrise and sunset shots happen because you planned them. Let’s go through the essentials.
Choosing the Right Location
Before you raise the camera, pick a spot that has a strong horizon and interesting foreground.
If you’re shooting at sunrise, you’ll often face east (and sunset means facing west) so think about what lies in that direction. Rough shorelines, silhouetted trees, or calm water reflections—they all add character.

Timing Matters – Knowing the Moment
Sunrise vs sunset: there are subtle but real differences.
At sunrise you often have calm air, less human activity, mist, and cleaner light.
Sunset might bring more vibrant colours but also more haze and distractions.
Arrive early—at least 20-30 minutes before the sun actually appears (or sets). That way you catch the build-up, not just the peak moment.
Checking Weather and Atmosphere
Clouds can be your best friend or your worst enemy.
Thin clouds catch colour beautifully; thick overcast kills it.
Also consider haze or mist—light fog in the morning can add softness and atmosphere.
Check apps like PhotoPills or The Photographer’s Ephemeris for sunrise/sunset direction, time, and cloud cover forecasts.
>>> TODAY’s camera deals click HERE <<<
Camera Settings & Gear
You don’t need the most expensive camera—but you do need to know how to use it. Let’s talk settings and tools.
Aperture, Shutter Speed & ISO
-
Aperture: f/8–f/16 keeps your shot sharp and detailed.
-
Shutter speed: keep it fast enough if handheld, or slower on a tripod.
-
ISO: as low as possible (100–200) to minimize noise.
Balancing these three—aperture, shutter, ISO—lets you achieve perfect light balance without losing detail.
White Balance and RAW Format
Set your white balance to Daylight or Cloudy to preserve that warmth.
Better yet, shoot in RAW—it gives you flexibility in post-processing to recover highlights or shadows.
Using Tripod, Filters and Accessories
Use a sturdy tripod. Early or late light often means slower shutter speeds.
You might also want:
-
Graduated ND filters to darken bright skies
-
ND filters for creative long exposures
-
Remote shutter release (or your camera’s timer) to avoid shake
Composition Tips
A great sunrise or sunset shot isn’t only about the sun—it’s about storytelling through your frame.
Using Foreground & Horizon Lines
Include an interesting foreground—rocks, flowers, puddles—to add depth.
Avoid placing your horizon right in the middle.
Use the rule of thirds to balance your sky and land elegantly.
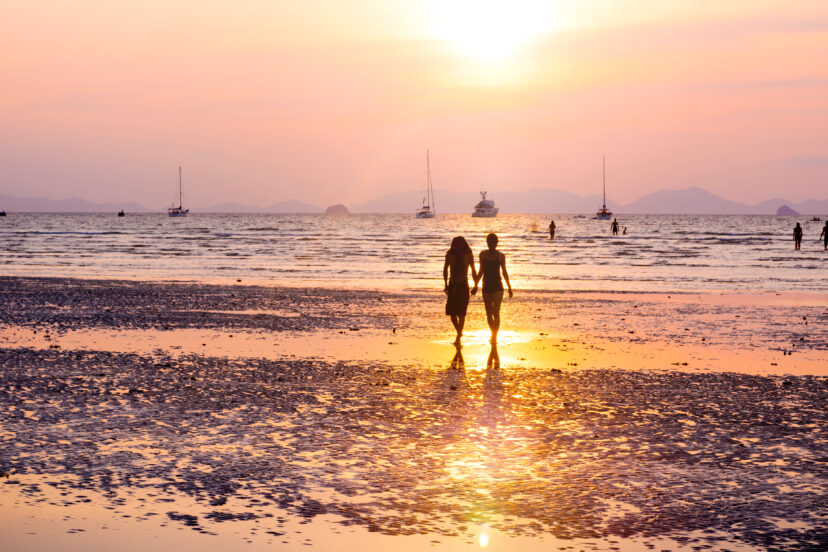
Silhouettes and Reflections
Silhouettes are an easy way to create drama—subjects in shadow against glowing skies.
Reflections in water or wet sand can double the impact and add a symmetrical look.
Exposing for the Scene
Sunrise and sunset scenes can be tricky—there’s often a huge difference between light and dark areas.
Balanced Exposure – Dealing with Bright Sun
If you expose for the sky, the foreground turns dark.
Expose for the ground, and the sky burns out.
Solution? Bracket your shots (take 3+ at different exposures) and merge them later—or check your histogram to avoid clipping highlights.
Using Graduated ND Filters & Exposure Blending
A graduated ND filter balances brightness between sky and foreground.
Alternatively, take two shots (one for sky, one for land) and blend them in Lightroom or Photoshop for a seamless, balanced look.
Post-Processing to Enhance Your Images
Editing isn’t cheating—it’s polishing. The goal is to enhance what the camera saw, not fake it.
Basic Adjustments
-
Fix exposure, contrast, and highlights/shadows
-
Add clarity gently—don’t over-sharpen
-
Crop to strengthen composition if needed
Keep your edits subtle so the natural beauty shines.
Fine-Tuning Colours and Mood
Warm up the tones slightly to emphasize the glow of golden light.
Boost vibrance a little—but avoid turning your sky neon orange.
A soft vignette can focus attention toward the horizon.
>>> TODAY’s camera deals click HERE <<<
Common Mistakes and How to Avoid Them
Even pros slip up! Here are common traps I learned to dodge:
-
Overexposure: Avoid shooting directly into harsh sunlight.
-
Crooked horizons: Use your camera’s grid or spirit level.
-
Ignoring the foreground: A flat bottom half kills depth—include texture.
-
Arriving late: The best light often happens before sunrise or after sunset.
-
Over-editing: Oversaturated skies look artificial; natural tones always win.
My Favourite Sunrise & Sunset Shoot Checklist
Print this or save it on your phone—it’s a lifesaver!
-
Check sunrise/sunset times and direction
-
Scout the location beforehand
-
Watch the weather forecast
-
Bring: camera, tripod, filters, remote, spare battery
-
Arrive early, set up, frame foreground + horizon
-
Shoot in RAW, ISO 100–200, aperture around f/11
-
Review histogram; bracket exposures if needed
-
Stay 15–20 minutes after the sun disappears (the colour evolves!)
-
Backup and edit later
Conclusion
Shooting a stunning sunrise or sunset is about patience, preparation, and your eye for light.
When everything aligns—the colours, the reflections, the stillness—it feels like magic.
Remember: plan your location, control your exposure, and let nature’s light be the star. With practice, you’ll learn how to shoot breathtaking sunrise & sunset photos with perfect light balance—and turn fleeting moments into lasting art.
>>> TODAY’s camera deals click HERE <<<
FAQs
Q1: Do I need a special lens for sunrise/sunset photography?
No. A wide-angle lens is great for landscapes, but even your kit lens can work wonders if you compose thoughtfully.
Q2: Should I use Auto White Balance?
I suggest setting it to Daylight or Cloudy. It keeps those warm tones you want, and shooting RAW gives you the flexibility to fine-tune later.
Q3: Can I shoot handheld?
Yes, if light allows. But using a tripod gives you sharper results and creative freedom for longer exposures.
Q4: What’s the best time to arrive?
Arrive 20–30 minutes early. You’ll catch pre-sunrise glow or post-sunset colours that most people miss.
Q5: When should I stop shooting?
Wait at least 10–15 minutes after the sun disappears—some of the best colours come after the main event.
Further photo tips here:
Golden Hour Photography: Mastering Nature’s Most Magical Light


