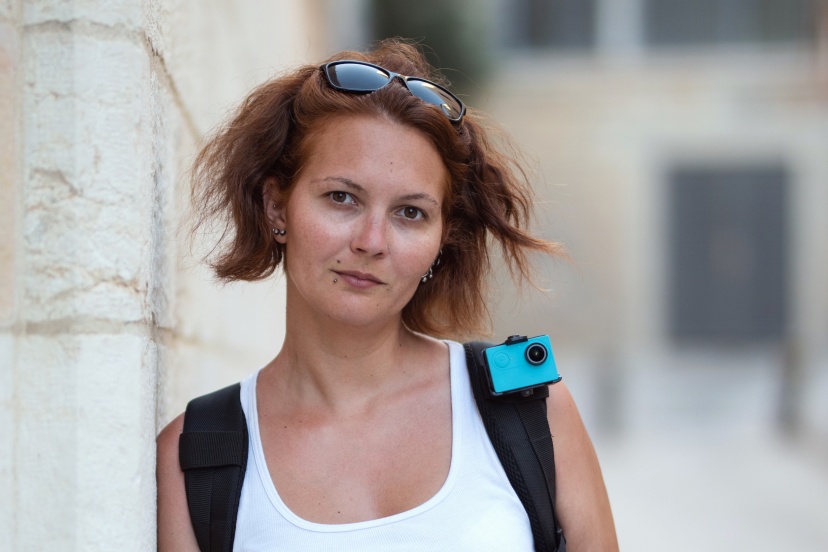
How to Blur Background in Portrait Photography Naturally
If you’ve ever admired portraits with soft, dreamy backgrounds and wondered how to achieve that same magic, you’re in the right place. In this guide, I’ll show you how to learn how to blur background in portrait photography naturally for pro bokeh effects—without relying on heavy software edits or fake filters.
Why a Blurred Background Matters
A blurred background, or bokeh, makes your subject stand out and adds depth to your photo. It transforms a simple portrait into something professional-looking and emotionally captivating.
The Power of Bokeh in Portraits
That smooth blur isn’t just pretty—it directs the viewer’s focus to the subject’s eyes and expressions, where the story lives.
Natural vs Artificial Background Blur
While phone apps can fake blur, nothing beats the creamy, natural bokeh achieved through real camera settings and lens techniques.
Understanding Depth of Field (DoF)
What Is Depth of Field?
Depth of field determines how much of your image appears sharp. A shallow depth of field means your subject is in focus, while the background melts into softness.
Factors That Affect Depth of Field
Three main things control DoF:
-
Aperture: Wider openings = blurrier backgrounds.
-
Distance: Closer subjects = stronger blur.
-
Lens focal length: Longer lenses compress backgrounds beautifully.
Using Aperture for Natural Background Blur
Wide Aperture Settings Explained
Your aperture setting (f-stop) controls how much light enters the lens. A lower f-number like f/1.8 or f/2.8 gives a shallower depth of field, creating that dreamy background blur.
How to Choose the Right f-stop
For portraits, start around f/1.8–f/2.8 for a soft, natural effect. If you’re shooting groups, raise it to f/4–f/5.6 to keep everyone in focus.
Creative Control Through Aperture
Try varying your f-stop between shots. You’ll quickly see how aperture changes mood and background texture.
Distance: The Secret Ingredient
Subject-to-Background Distance
The farther your subject stands from the background, the blurrier it will appear. Aim for 3–5 meters between them for strong separation.
Camera-to-Subject Distance
Move closer to your subject. The closer you get, the shallower your depth of field becomes—and the blur intensifies naturally.
Lens Choice for Professional Bokeh
Prime vs Zoom Lenses
Prime lenses (like 50mm or 85mm) have wider apertures and produce smoother bokeh than zoom lenses. They’re sharp, fast, and perfect for portraits.
Best Focal Lengths for Portrait Blur
-
50mm: Ideal for natural portraits.
-
85mm: Classic bokeh king.
-
135mm: Dreamy compression and background isolation.
My Favorite Lenses for Portraits
If you’re using Canon, try the EF 85mm f/1.8. For Sony users, the FE 50mm f/1.8 is an affordable gem.
>>> TODAY’s best deals CLICK HERE <<<
Using Camera Settings for Natural Blur
Manual Mode Tips
Switch to manual mode to take control of aperture, shutter speed, and ISO. Start with:
-
Aperture: f/2.0
-
Shutter: 1/200 sec
-
ISO: 100
Balancing ISO, Shutter Speed, and Aperture
Keep ISO low for clean images, and adjust shutter speed to prevent overexposure. Always prioritize aperture for depth control.
Lighting and Background Composition
Using Natural Light to Enhance Blur
Soft, diffused lighting—like golden hour—enhances the look of blurred backgrounds. Avoid harsh noon light that flattens depth.
Choosing the Right Background
Pick backgrounds with texture and color contrast, like foliage or lights. They turn into beautiful circular bokeh patterns when blurred.
Smartphone Portraits: Can You Get Natural Blur?
Using Portrait Mode Effectively
Modern smartphones simulate shallow depth using dual lenses and AI. Use it outdoors with strong subject-background distance for best results.
Tricks for Shallow Depth of Field on Phones
-
Get closer to your subject
-
Tap to focus on the eyes
-
Keep background well-lit and distant
Post-Processing Enhancements
Subtle Blur Editing in Lightroom or Photoshop
If your background isn’t as soft as you’d like, gently enhance blur using the Adjustment Brush or Gaussian Blur filter.
Maintaining a Natural Look
Avoid overdoing it. Natural blur fades gradually—over-editing creates harsh edges and fake-looking results.
Common Mistakes to Avoid
Overusing Software Blur
Too much digital blur ruins realism. Aim to get most of the effect in-camera.
Ignoring Subject Separation
Even with wide apertures, if your subject stands too close to the background, blur will be minimal. Distance matters!
Practice Exercises for Mastering Bokeh
Outdoor Practice Setup
Take a friend to a park. Position them 4–5 meters from trees or lights. Shoot with f/2.0, then f/4, then f/8—and compare results.
Experimenting with Angles and Distances
Move around your subject and vary camera height. Small angle changes can completely transform how background blur looks.
Conclusion
Once you learn how to blur background in portrait photography naturally for pro bokeh effects, your portraits will instantly look more cinematic and professional. With the right combination of aperture, distance, and lens choice, you’ll create stunning depth without relying on filters or apps.
>>> TODAY’s best deals CLICK HERE <<<
FAQs
1. What is the best f-stop for portrait background blur?
f/1.8–f/2.8 works best for soft, creamy backgrounds.
2. Can I blur the background with a kit lens?
Yes! Just zoom in and keep your subject far from the background.
3. How far should my subject be from the background?
At least 3 meters (10 feet) for noticeable separation.
4. Why is my background not blurring enough?
You might be too far from your subject or using a narrow aperture.
5. Does lighting affect background blur?
Absolutely! Soft, directional lighting enhances bokeh and depth perception.
Further photo tips here:
Art of Portrait Photography: Master Techniques for Stunning Shots


