Common Photography Mistakes & How to Avoid Them
When I first picked up my camera, I made a ton of mistakes. Some were embarrassing. But each slip taught me something new. In this post, I’ll guide you through common beginner photography mistakes to avoid—so you don’t waste time repeating what I did. I’ll explain why each mistake matters, and how you can avoid it right away.
Introduction: Why mistakes are part of learning
Photography is a craft, not magic. We all mess up at first. Mistakes are signals: “Hey—you need to rethink this setting” or “Try a new angle.” Embracing them is how you grow. But we don’t want to stay stuck. In this article, I’ll help you shortcut your path by pointing out pitfalls and giving you clear steps to dodge them.
Not Understanding Your Camera Settings
Many beginners leave their camera in Auto mode forever. That’s safe—but limiting.
Relying too long on Auto / Program mode
When your camera picks everything, you lose control over creative decisions. You’ll find it hard to shoot in tricky light or to evoke mood. To avoid this: gradually move into Aperture Priority (Av/A) or Shutter Priority (Tv/S), then step up to full Manual (M) mode.
Ignoring ISO, Shutter Speed, Aperture interplay
These three settings form the exposure triangle. If you change one, you must compensate with another. If you don’t master this, your images will be overexposed, underexposed, or blurry. A practical exercise is: fix two, vary the third, and see the results. Try keeping ISO constant and experimenting with aperture and shutter speed.
Overlooking White Balance & Exposure Compensation
Auto white balance sometimes misjudges colors (making skin look green, blue, or yellow). Learning to set it manually—or using custom presets—improves realism. Also, exposure compensation is your friend: if your shot is consistently too dark, dial +EV, and vice versa. Don’t rely blindly on auto-metering.
H2: Poor Focus & Sharpness
Focus issues can ruin what would have been a great image.
Using the wrong focus point
Most cameras default to a central focus point. But your subject might not be there. Learn to choose and move focus points—so you focus exactly where you want (often the eyes, in portraits).
Camera shake and slow shutter speeds
If your shutter is too slow (e.g. 1/30s) and you’re handholding, blur creeps in. Rule of thumb: use a shutter speed at least as fast as 1 / (focal length * crop factor). Or use a tripod, faster shutter, or stabilize your body.
Too wide apertures without care
Using f/1.8 or f/2.8 gives shallow depth of field—nice for background blur—but your plane of focus is thin. If you miss focusing exactly, your subject might be out of focus. Solution? Stop down (f/4–f/5.6) when you need more margin, especially for moving subjects.
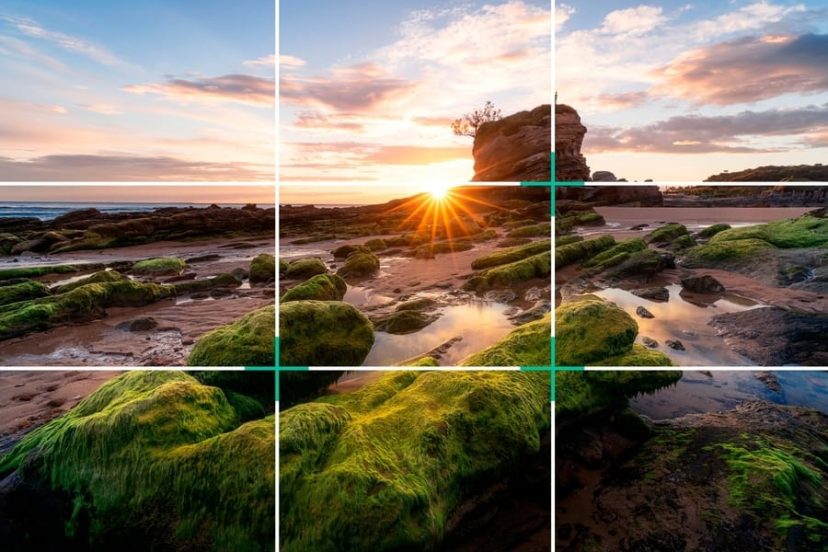
Weak Composition & Framing Mistakes
A technically perfect shot can still be dull if composition is weak.
Centering subject all the time
Putting your subject always in the center gets boring. Use the rule of thirds, off-center framing, or negative space to add interest.
Cluttered, distracting backgrounds
Background distractions—poles, wires, bright spots—can steal attention. Before pressing the shutter, scan the edges. Move or reframe to simplify.
Horizon not level / slanted lines
A tilted horizon kills landscape photos. Always check your level (many cameras have grid/horizon tools). Align verticals (buildings, trees) carefully too.
>>> See TODAY’s camera hot deals HERE <<<
Bad Use of Light & Timing
Light is everything in photography. Misusing it is a big mistake.
Shooting in harsh midday sun
Midday sun is brutal. It casts harsh shadows and creates contrast you can’t manage. Instead, aim for golden hour (sunrise, sunset) or overcast days, when light is soft and even.
Ignoring direction and quality of light
Side light, backlight, front light—they each create different moods. Don’t always aim for “flat light.” Try putting your subject into rim light or side light, and see how the mood changes.
Not using golden hour or bad timing
Your best light often appears just after sunrise or before sunset. Plan shoots around those windows. Don’t assume midday is your only option.
Overprocessing or Underprocessing
Editing is powerful—used poorly, it can break your image.
Heavy-handed edits & unrealistic look
Don’t go overboard with saturation, skin smoothing, or HDR. Overprocessed images look fake. Ask yourself: does it still look like a real scene? If not, tone it down.
Skipping basic editing & leaving flaws
Conversely, leaving glaring issues—lens distortion, horizon tilt, color casts—makes your work look amateur. Even simple fixes (cropping, straightening, white balance, sharpening) elevate your photos.
H2: Not Practicing Enough or Lack of Variety
You’ll only improve if you get out and shoot regularly.
Shooting the same subjects & scenes always
If you always photograph your cat or your backyard, your skills won’t stretch. Try new genres—street, macro, architecture—to broaden your eye.
Not revisiting locations under different conditions
That park you shot last week at noon might look magical at sunrise or in fog. Return to the same scene in different light/weather to see how mood shifts.
Neglecting Gear Maintenance & Handling
Your equipment matters—even though the eye behind it matters more. Don’t neglect it.
Dirty sensor, lens dust spots
Dust on the sensor or lens ruins shots with spots and artifacts. Clean your gear regularly (with proper tools). Use blower, avoid switching lenses in dusty environments.
Dropping gear, poor handling habits
Be gentle. Use straps, stabilize your body, always support the lens. Gear is expensive, and a fall can knock alignment off or break expensive parts.
Ignoring Post-Processing Basics
Editing is part of the process, not an afterthought.
Not learning RAW vs JPEG
RAW files carry far more latitude (color, exposure) than JPEG. If you shoot JPEG only, you limit recovery in editing. Learn to shoot RAW and get comfortable with RAW workflow.
Neglecting histogram and proper exposure in post
Your eye can mislead you on screens. Use the histogram as a guide—avoid blown highlights or crushed shadows. Make edits based on data, not just what “looks good” on the display.
>>> See TODAY’s camera hot deals HERE <<<
Underestimating Composition Guides & Rules
Composition rules aren’t rigid laws—they’re helpers.
Ignoring rule of thirds, leading lines
These classic composition tools guide the viewer’s eye. Use them, break them intentionally. A strong line or shape can direct your eye through the frame.
Avoiding negative space, symmetry, framing
Negative space (empty area) gives breathing room. Symmetry can be powerful. Framing (natural frames—arches, branches) adds depth. Mix them to avoid monotony.
Lack of Intent & Vision
A photo without purpose can feel aimless.
Shooting without a purpose
If you don’t know why you’re taking a photo, it often shows. Ask: What’s my subject? What mood or story am I after? Let that guide your decisions.
Chasing every “cool scene” blindly
Just because something looks “interesting” doesn’t mean it’s a composition or story. Be selective. Don’t follow every bright light or person on the street. Slow down, evaluate, compose.
How to Break These Bad Habits
Avoiding mistakes is one thing. Building strong habits is how you raise your game.
Develop a checklist & instant review habit
Before every shot, run a mini checklist: focus point, exposure, composition, background. After each shot, review your image (zoom in) and ask what you’d do differently.
Join critique groups / compare your shots
Feedback helps you see errors you miss. Share your work, study others, get critique. Over time you’ll internalize better judgment.
Set small learning goals each shoot
Don’t try to fix everything in one go. Today, focus on mastering aperture control. Next session, try composition. Tiny goals compound into big gains.
Conclusion
We all start as beginners, and most of us fall into the same traps. But by being aware of these common beginner photography mistakes to avoid, you can accelerate your growth. Focus on mastering your camera, caring about light, composing with intention, and processing thoughtfully. Make small, intentional improvements every time you shoot—and you’ll look back in a few months and wonder how far you’ve come.
>>> See TODAY’s camera hot deals HERE <<<
FAQs
Q1: At what point should I switch from Auto mode to Manual?
Start gradually. When you feel comfortable tweaking one parameter (say aperture), switch that to manual, then add others. Don’t rush it—progress naturally.
Q2: How do I know if my photos are sharp enough?
Zoom in at 100% on your computer. If the critical area (e.g. eyes, subject) is tack sharp, you’re good. If not, evaluate focus choice, shutter speed, and motion.
Q3: Is rule of thirds always the best composition?
No. It’s a guideline, not a rule. Sometimes centering or symmetry works beautifully. Use it, break it intentionally, but always with purpose.
Q4: How often should I clean my sensor/lens?
Check monthly or after dusty shoots. Use a blower first. Professional cleanings can be done yearly or if you see persistent spots. Be gentle.
Q5: What’s the best way to practice consistently?
Give yourself mini photo challenges (e.g. “shoot only with f/2.8 today,” or “black & white portraits”). Carry your camera everywhere. The more you shoot, the faster you’ll improve.
More photo tips here:
Food Photography: My Ultimate Guide to Capturing Deliciousness


