Best Camera Settings for Golden Hour Photography
Master golden hour camera settings for soft, glowing portraits and scenes.
Golden hour is my favorite time to shoot—hands down. That soft, glowing light feels almost magical, like nature flipping on a cinematic filter just for photographers. In this guide, I’ll help you master golden hour camera settings for soft, glowing portraits and scenes using real-world experience and practical advice.
What Is Golden Hour and Why It Matters
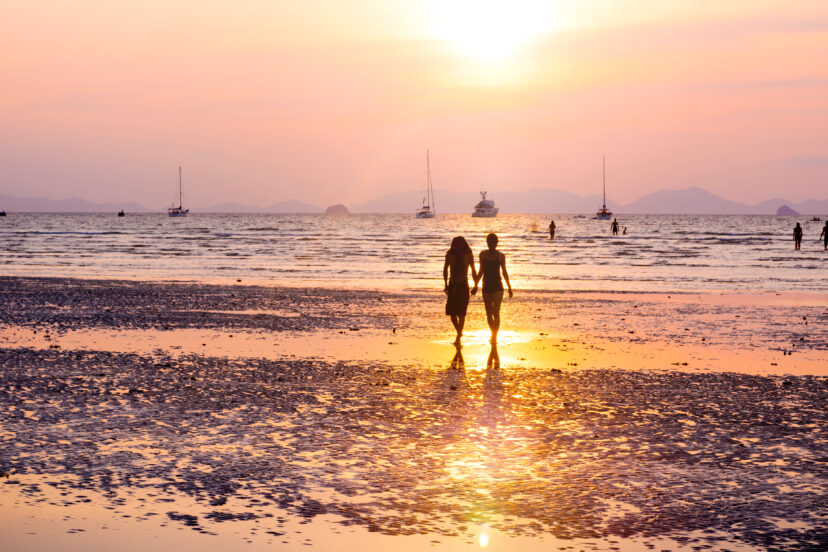
Golden hour occurs shortly after sunrise and just before sunset, when the sun sits low on the horizon. The light becomes warmer, softer, and more directional—perfect for flattering skin tones and dramatic scenes.

Morning vs Evening Golden Hour
Morning golden hour delivers crisp, cooler tones with minimal haze, while evening golden hour leans warmer and more dramatic. I personally favor evenings for portraits, but mornings are unbeatable for peaceful landscape scenes.
Why Camera Settings Matter During Golden Hour
Golden hour light changes quickly. If your camera settings don’t adapt, you risk blown highlights or dull colors. Dialing in the right exposure ensures you preserve warmth and detail while maintaining creative control.
Master Golden Hour Camera Settings for Soft, Glowing Portraits and Scenes
Golden hour rewards intentional shooting. When you slow down and take control of your settings, your images instantly feel more polished and emotionally engaging.
Start With Shooting in Manual or Aperture Priority
I rotate between Manual mode and Aperture Priority. Aperture Priority works beautifully when lighting is steady, while Manual gives you consistency when backlighting or silhouettes come into play.
ISO Settings for Golden Hour Photography
ISO controls image clarity and noise—two things you want to manage carefully during golden hour.
Keeping ISO Low for Clean Images
Start at ISO 100 or 200 whenever possible. Golden hour still provides plenty of light, and a low ISO keeps images sharp and noise-free.
When to Raise ISO Slightly
As the sun dips, don’t hesitate to raise ISO to 400–800. A slightly noisy image is far better than motion blur or missed focus.
Aperture Settings for Golden Hour
Aperture shapes mood, depth, and storytelling.
Wide Apertures for Portraits
For portraits, I love shooting between f/1.8 and f/2.8. Wide apertures create creamy backgrounds and let golden light gently wrap around your subject.

Narrow Apertures for Landscapes
For landscapes, I stop down to f/8–f/11. This ensures edge-to-edge sharpness and preserves sun rays without sacrificing detail.
Shutter Speed Choices During Golden Hour
Shutter speed balances exposure and motion.
Freezing Motion vs Embracing Blur
I aim for 1/200s or faster for portraits. For creative landscapes, slower speeds like 1/10s can add artistic motion to clouds or water.
White Balance Settings for Warm Tones
White balance plays a huge role in preserving golden hour warmth.
Auto vs Kelvin White Balance
Auto WB works, but Kelvin mode (5200K–6500K) locks in warmth so your camera doesn’t neutralize the magic.
Metering Mode and Exposure Compensation
Matrix/Evaluative metering works best overall. When shooting into the sun, dial in -0.3 to -1 EV to protect highlights.
Focus Settings for Golden Hour Shots
Low-angle light can confuse autofocus systems if you’re not careful.
Single Point AF vs Continuous AF
Use single-point AF for portraits and continuous AF for moving subjects to maintain accuracy as light fades.
Shooting in RAW for Maximum Flexibility
Always shoot RAW. RAW files preserve highlight and shadow detail, giving you far more freedom when editing golden hour tones.
>>> Discover prime DSLR lenses HERE <<<
Common Golden Hour Camera Setting Mistakes
Avoid these:
Shooting JPEG only
Overexposing skies
Using Auto WB blindly
Forgetting to adjust settings as light fades
Putting It All Together in Real Scenarios
Let’s apply everything practically.
Portrait Scenario
Mode: Aperture Priority
Aperture: f/2
ISO: 100–400
White Balance: 6000K
Landscape Scenario
Mode: Manual
Aperture: f/9
ISO: 100
White Balance: Daylight
Conclusion
Golden hour photography isn’t luck—it’s preparation. When you truly master golden hour camera settings for soft, glowing portraits and scenes, your images become richer, warmer, and more emotionally compelling every single time.
>>> Discover prime DSLR lenses HERE <<<
FAQs
1. What camera mode is best for golden hour photography?
Aperture Priority or Manual mode offers the most control.
2. Should I use Auto White Balance?
Kelvin or Daylight WB preserves warmth better.
3. Is golden hour beginner-friendly?
Yes—it’s the most forgiving natural light available.
4. What lens works best for golden hour portraits?
A fast prime like a 50mm f/1.8 is ideal.
5. Can smartphones capture golden hour well?
Absolutely—just lower exposure slightly and tap to focus.
Further photo tips here:
Golden Hour Photography: Mastering Nature’s Most Magical Light