Beginner’s Guide to Flash Photography
Why Learn Flash Photography?
The Benefits of Using Flash Indoors
Have you ever tried shooting indoors only to end up with grainy, dark photos? Flash can be your best friend here. It lets you brighten your subject, reduce blur, and capture sharp, professional-looking shots.

Common Myths About Flash
A lot of beginners think flash always looks harsh and fake. But in reality, with the right techniques, flash can create natural-looking light that feels warm and inviting.
Understanding the Basics of Flash
What Is Flash in Photography?
In simple terms, flash is an artificial burst of light that helps illuminate your subject. It works by firing at the same time as your camera shutter, freezing the moment.
Types of Flash: Built-In vs. External
-
Built-in flash: Convenient but often harsh and direct.
-
External flash (speedlight): More powerful, flexible, and lets you bounce or diffuse light for softer results.

Essential Gear for Flash Photography
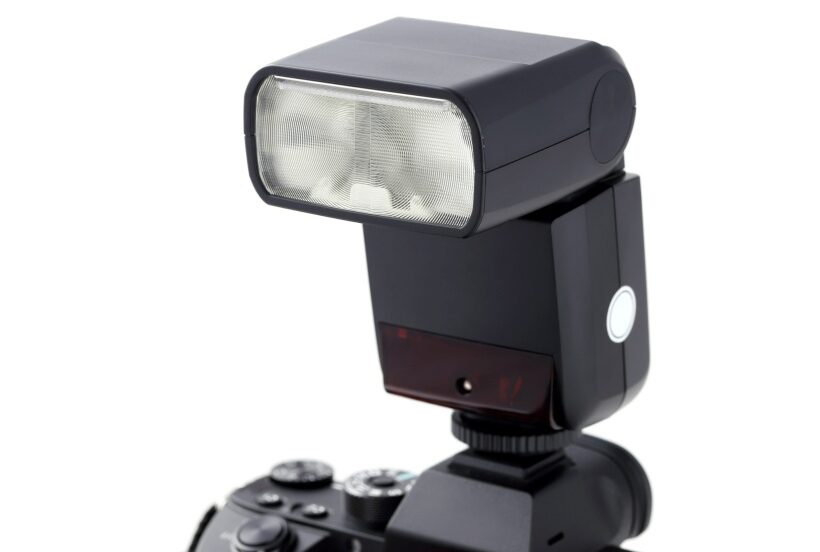
Speedlights
Speedlights are external flashes that attach to your camera or work off-camera. They give you far more control over direction, intensity, and creativity.
Light Modifiers (Diffusers, Softboxes, Umbrellas)
Raw flash light is often too harsh. A diffuser or softbox spreads it out, making shadows softer and the light more flattering.
Tripod and Remote Triggers
Tripods stabilize your shots, while remote triggers let you fire your flash without keeping it mounted on the camera. Great for creative setups indoors.
>>> Get TODAY’s deals on camera flash HERE <<<
Camera Settings for Indoor Flash Photography
ISO Settings
Keep your ISO low (like 100–400) when using flash indoors to reduce noise. The flash provides the light, so you don’t need to crank ISO high.
Shutter Speed and Flash Sync
Your shutter speed controls how much ambient light you capture. Start with 1/200 sec (or your camera’s flash sync speed). This keeps backgrounds natural without blurring.
Aperture Control
Wider apertures (like f/2.8–f/4) let in more light, but be mindful of depth of field. Narrower apertures (like f/8) work well for group shots with flash.

Flash Photography Techniques for Beginners
Bouncing the Flash
Instead of firing flash directly at your subject, aim it at a wall or ceiling. This spreads the light evenly and avoids harsh shadows.
Diffusing the Light
Attach a diffuser to soften light. Even a simple DIY diffuser (like white tissue paper over your flash) can make a big difference.
Using Off-Camera Flash
Move your flash off the camera using a trigger. This gives you directional light that looks more natural and professional.
Creative Indoor Flash Photography Ideas
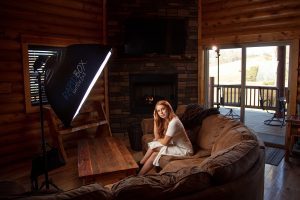
Portraits with Soft Light
Use a softbox or umbrella with your flash for flattering indoor portraits. This mimics window light and makes skin tones glow.
Freeze Action Indoors
Flash duration is extremely fast. Use it to freeze motion—like capturing kids jumping or a splash of water indoors.
Adding Mood with Shadows
Play with angles. Position your flash to the side for dramatic shadows that add storytelling depth to your indoor photos.
Common Mistakes Beginners Make
Overexposing Subjects
Don’t let the flash overpower everything. Dial down the flash power or bounce it to avoid “washed out” faces.
Harsh Shadows and Flat Light
Direct flash can cause harsh nose shadows or flat, boring light. Always look for ways to soften or redirect it.
Ignoring White Balance
Flash is usually daylight balanced, but indoor lamps may create color mismatches. Adjust white balance in-camera or fix it later in editing.
>>> Get TODAY’s deals on camera flash HERE <<<
Post-Processing Tips for Flash Photography
Adjusting Exposure and Highlights
Use editing software to fine-tune exposure. Bring down highlights if your flash made some areas too bright.
Fixing Color Casts
If indoor lighting mixes with flash, your photos may have a weird color cast. Correct this with white balance adjustments in Lightroom or Photoshop.
Practice Exercises for Mastery
Single Flash Portrait Practice
Set up one flash with a diffuser and practice portraits. Move the flash around to see how direction affects shadows and mood.
Bounce vs. Direct Flash Comparison
Take two photos: one with direct flash, one with bounced flash. Compare results and see how much softer bounce looks.
Low-Light Indoor Challenge
Turn off most lights and rely on flash only. Play with flash power and angles to create interesting low-light shots.
Conclusion
Learning flash photography might feel intimidating at first, but once you get the hang of it, it opens a world of creative possibilities. Indoors, where light is often scarce, flash is your ticket to crisp, professional shots. Remember: bounce, diffuse, and experiment. The more you play with light, the more confident you’ll become.
>>> Get TODAY’s deals on camera flash HERE <<<
FAQs
1. What is the best flash for beginners?
A simple external speedlight is a great place to start—it’s affordable and versatile.
2. Can I use flash with natural light indoors?
Yes! Blending flash with window light can create balanced, natural-looking photos.
3. Do I need special gear for indoor flash photography?
Not really. A speedlight, a diffuser, and maybe a tripod are more than enough to start.
4. How do I avoid the “red-eye effect”?
Use off-camera flash or bounce your flash. Red-eye usually happens with direct, on-camera flash.
5. Is flash photography only for portraits?
Not at all. You can use flash for product photography, food, events, and even creative storytelling indoors.


