Beginner’s Guide to DSLR Photography
So, you’ve got your hands on a DSLR and you’re wondering where to even begin? I’ve been there. When I first picked up my camera, I had no clue what half the buttons did. But don’t worry — by the end of this guide, you’ll feel confident holding your camera, adjusting settings, and capturing photos you’re proud to share.
What is a DSLR Camera?
A DSLR, or Digital Single-Lens Reflex camera, is a powerful tool that gives you full control over how your photos look. Unlike smartphones or compact cameras, DSLRs let you change lenses, tweak exposure settings, and shoot in low light with ease.
DSLR vs. Mirrorless: What’s the Difference?
DSLRs use a mirror mechanism to reflect the image into an optical viewfinder. Mirrorless cameras, as the name implies, don’t. Mirrorless models are lighter and newer, but DSLRs often offer better battery life and optical viewfinder clarity — perfect for learning the basics.
Getting to Know Your DSLR
Before you shoot, get familiar with your gear.
The Main Components Explained
Lens
Your lens determines what your camera sees. DSLRs allow you to switch lenses for different purposes — wide-angle for landscapes, telephoto for wildlife, and so on.
📸 Suggested Image: A labeled diagram of DSLR lens types. (Unsplash: “Camera Lens” by ShareGrid)
Body
This is where the sensor, buttons, and screen live. It’s the brains of your camera. The lens mounts directly onto the body.
Viewfinder
This little window lets you compose your shot through the lens — literally.
Understanding Modes (Auto, Manual, etc.)
Your mode dial (usually on top) includes:
-
Auto: The camera does everything.
-
Manual (M): You’re in charge of ISO, shutter speed, and aperture.
-
Aperture Priority (A or Av): You set aperture, camera does the rest.
-
Shutter Priority (S or Tv): You set shutter speed, camera picks aperture.
How to Hold a DSLR Properly
Bad technique = blurry photos.
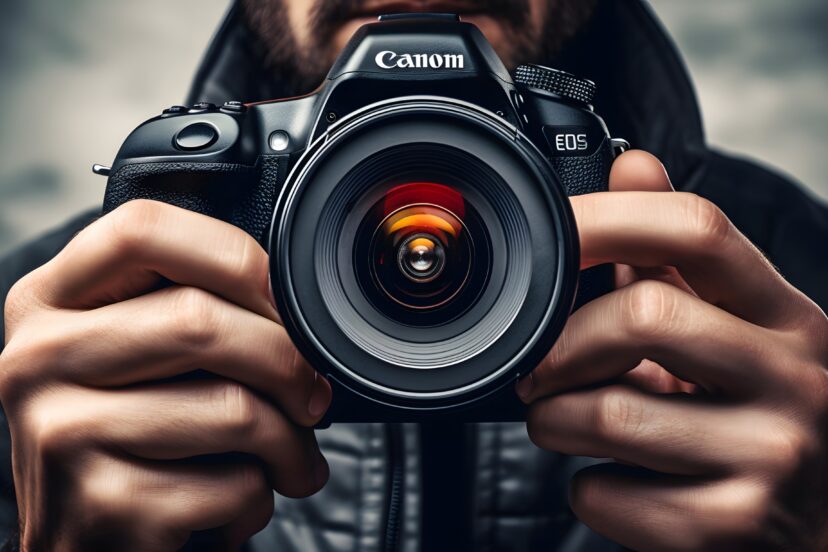
📸 Suggested Image: Proper DSLR hand-holding technique. (Pexels: “Man Holding DSLR” by George Milton)
Tip: Use your right hand to grip the body, your left under the lens, and keep your elbows close to your body. Use a strap for added security.
Mastering Focus: Manual vs Autofocus
Manual focus gives you precision; autofocus is quick and handy. For beginners, start with autofocus. Use single-point AF to choose where your camera focuses.
How to Use a DSLR Camera for Beginners
Let’s walk through the actual setup process.
Step-by-Step DSLR Setup Guide
-
Charge your battery and insert a memory card.
-
Attach the lens securely.
-
Switch to Auto Mode to test your first few shots.
-
Turn off flash if unnecessary.
-
Review images and adjust accordingly.
Choosing the Right Settings (ISO, Aperture, Shutter Speed)
Learning the “exposure triangle” is key.
What is ISO?
ISO controls your camera’s sensitivity to light. Lower ISO (100–200) is best for daylight; higher ISO (800+) for low light — but it adds noise.
Understanding Aperture
Measured in f-stops (like f/2.8, f/5.6), a lower f-stop means more background blur. Great for portraits!
📸 Suggested Image: Comparison of aperture sizes and depth of field. (Pixabay: “Aperture Chart”)
The Role of Shutter Speed
Shutter speed affects motion. Fast (like 1/1000s) freezes action. Slow (1/30s or slower) creates motion blur — perfect for waterfalls or light trails.
>>> See full range and prices of DSLR camera kits HERE <<<
Understanding the Exposure Triangle
This is the core of DSLR photography. ISO, shutter speed, and aperture work together to determine exposure. Adjusting one means compensating with another.
Best Shooting Modes for Beginners
Start with Aperture Priority (A or Av) — you control depth of field, and the camera handles the rest. It’s ideal for portraits and learning light control.
Composing Your Shots
Composition turns snapshots into art.
The Rule of Thirds
Imagine a 3×3 grid over your photo. Place your subject along the lines or intersections to create balance.
📸 Suggested Image: Rule of Thirds grid overlay on a photo. (Pexels: “Sunset Composition” by Lukas Hartmann)
Leading Lines and Framing
Use roads, fences, or shadows to lead the eye to your subject. Frame shots using windows, arches, or foliage for visual interest.
Lighting Tips for Better Photos
Light can make or break a photo.
Using Natural Light
Golden hour (just after sunrise or before sunset) gives soft, warm light that’s incredibly flattering. Avoid harsh midday sun unless shooting in shade.
When to Use Flash
Use flash in dark indoor settings. If possible, bounce it off a wall or ceiling for softer results.
Post-Processing Basics
Even pros edit their photos.
Easy Editing Tools for Beginners
Try Lightroom, Snapseed, or Photoscape. Basic edits include:
-
Crop & straighten
-
Adjust brightness/contrast
-
Tweak color temperature
📸 Suggested Image: Editing interface of Lightroom with a portrait. (Unsplash: “Photo Editing” by Kelly Sikkema)
Common Mistakes Beginners Make
-
Shooting in full Auto all the time.
-
Ignoring focus points.
-
Overediting.
-
Using built-in flash too much.
-
Not backing up photos!
Practice Exercises to Improve Fast
-
Shoot the same subject using different apertures.
-
Try motion shots with varying shutter speeds.
-
Practice in different lighting conditions.
-
Use manual mode for a full day.
-
Create a photo-a-day challenge.
My Final Advice for Beginners
Practice is your best teacher. Don’t obsess over perfection — just shoot. Join online photography groups, ask for feedback, and keep experimenting. I promise it gets more rewarding with every photo you take.
Conclusion
Learning how to use a DSLR camera for beginners doesn’t have to be overwhelming. With a bit of practice, the right mindset, and a basic understanding of your camera’s settings, you’ll be shooting like a pro in no time. So grab your camera, head outside, and start exploring the world through your lens. You’ve got this!
>>> See full range and prices of DSLR camera kits HERE <<<
FAQs
1. What is the best DSLR camera for a beginner?
Most beginners start with models like the Canon EOS Rebel T7 or Nikon D3500 — simple, affordable, and powerful enough to grow with you.
2. Do I need multiple lenses right away?
Nope. The kit lens (usually 18–55mm) is versatile enough for most beginner shots. Upgrade when you know what you like shooting.
3. How do I blur the background in portraits?
Use a low aperture (like f/2.8) and stand closer to your subject. The more distance between subject and background, the blurrier it gets.
4. Why do my photos look dark or grainy?
Check your ISO (high ISO = more grain) and exposure settings. Try increasing light or using a tripod in low light.
5. How often should I clean my DSLR?
Wipe your lens regularly with a microfiber cloth. Clean the sensor less often — or leave that to a pro unless you know what you’re doing.
Check out our related articles:
.


