Long Exposure Photography: Create Stunning Light Trails and Smooth Water
If you’re anything like me — a photography enthusiast always chasing that next dramatic image — then you’re going to love this: I’m going to show you how to capture silky waterfalls and city lights with easy long exposure techniques. We’ll dive into how you can use slow shutter speeds, the right gear, and simple settings to transform ordinary scenes into extraordinary ones.
Why Use Long Exposure?
Have you ever looked at a photo of a waterfall where the water looks like mist or a city road where the car lights become ribbons of colour? That’s the magic of long exposure. By keeping your shutter open for longer than the eye would normally perceive, you’re literally ‘stretching time’ in your image. You freeze—or rather blur—motion while keeping static elements sharp. It’s a surreal look, and it gives your photography that “wow” factor.
What You Can “Capture silky waterfalls and city lights with easy long exposure techniques”
That’s our goal phrase. Think about it: on one side, you have nature—water flowing, waves crashing, rivers rushing. On the other side, you have urban energy—cars, light trails, night scenes. Both dynamic, both full of motion. And long exposure is the perfect tool to tame that motion and create something beautiful. Whether it’s a gently blurred stream or streaks of headlights across a bridge, you’re using technique to reveal something hidden to our eyes.
Two Main Subjects: Smooth Water & Light Trails
Let’s break it down:
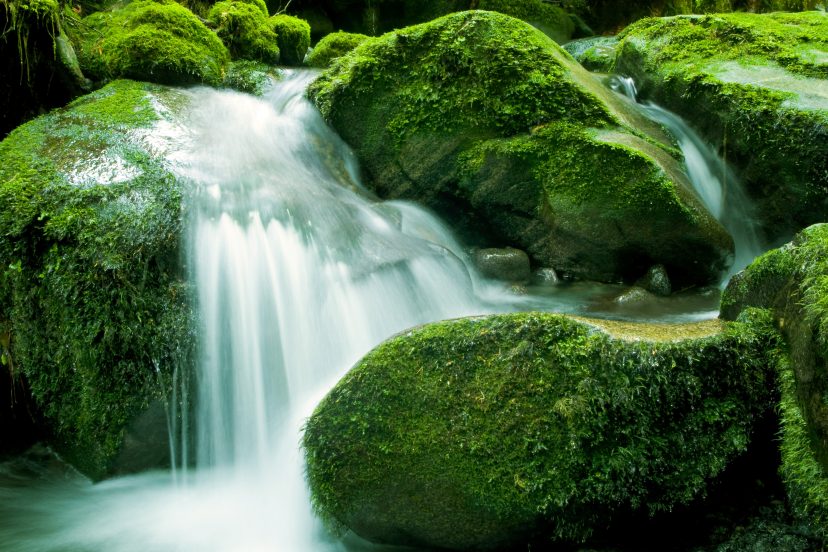
Smooth Water

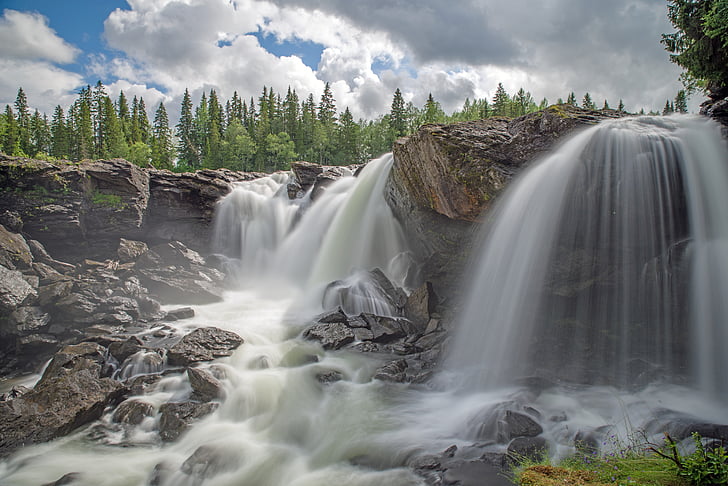

When you point your camera at flowing water and apply a longer shutter, you change how the water looks: instead of distinct drops or ripples, you get a silky sheet of motion. It’s dreamy, ethereal, and fitting for nature photography.
Light Trails
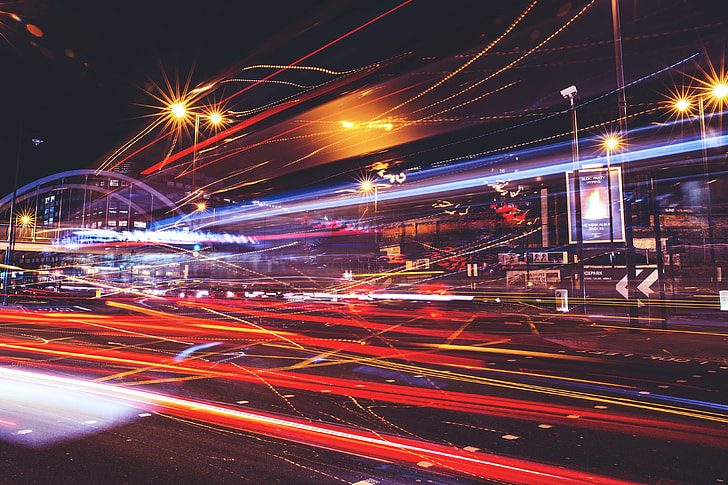
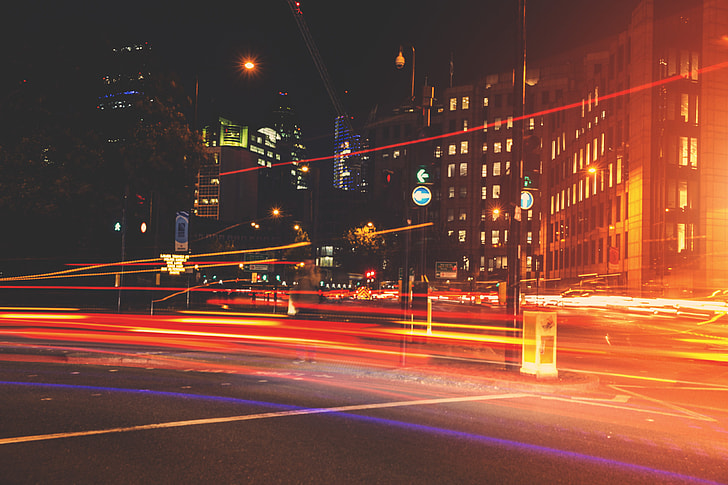

In an urban scene, instead of water you have lights moving. Cars, buses, trains—they leave trails when your shutter stays open. This transforms mundane city streets into dynamic, abstract lines of light.
Essential Gear for Long Exposure
Enough theory — what do you actually need in your camera bag?
Tripod & Stability
A sturdy tripod is non-negotiable. Since your shutter might be open for multiple seconds, any camera shake will ruin the effect. Set your camera on something solid, avoid pressing the shutter button directly (or use a remote/self-timer) to keep things sharp.
>>> Lightweight camera tripods CLICK HERE <<<
ND Filters & Polarizers
If you’re shooting in bright light (daytime waterfall, or dusk city lights), you may need a neutral density (ND) filter to cut down the light entering the lens. That gives you longer shutter speeds without blowing out the highlights. A polarizer can help with reflections and saturating clouds or leaves.
Camera Settings Basics
You’ll want full manual control: set your ISO, aperture and shutter speed. Use the lowest ISO you can to minimise noise. Choose an aperture that gives you depth but isn’t diffraction-limited (for many lenses f/8-f/16 is sweet). Set a long shutter speed—maybe several seconds for water, or 10-15 seconds (or more) for light trails. Digital Photography School+1
Step-by-Step: Shooting Smooth Waterfalls
Ready? Let’s walk through it:
Pick the Right Scene & Light
Look for water moving (river, waterfall, stream). Choose a time when the light isn’t too harsh—overcast days or early morning/late afternoon work great (you’ll avoid blown highlights). Stand out: include foreground rocks, moss, branches for interest.
Set Your Camera for Water Motion
-
ISO: set to lowest possible (e.g., ISO 100) to reduce noise and allow longer shutter. Visual Wilderness+1
-
Aperture: choose something like f/8-f/11 to keep depth while staying sharp. benharveyphotography.co.uk
-
Shutter speed: start with 1-3 seconds and experiment; if the water is moving quickly, maybe go 5-10 seconds or more.
-
Use a tripod, compose carefully. Focus before attaching any ND filter. If you use an ND filter, you’ll have to check focus carefully because the viewfinder might get dark.
Tip: Remove distractions—windy leaves, moving branches—they’ll blur and may distract your water effect.
Step-by-Step: Shooting City Light Trails
Switching gears to the urban side:
Choosing a Safe Urban Spot
Find a vantage point overlooking traffic: road, bridge, train station. Safety first: don’t stand in traffic. Arrive during blue hour (after sunset but before full dark) when there’s still ambient light and traffic is active.
Settings for Light Trails
-
ISO: again low (ISO 100 or 200) to minimise noise.
-
Aperture: you might choose f/5.6-f/11 to keep more of the scene sharp, but still allow enough shutter time. Digital Photography School
-
Shutter speed: rather long—try 10–20 seconds or more, to capture the full light trails of many moving vehicles.
-
Use tripod & remote shutter/2-sec delay to prevent shake.
-
Compose with stationary scene elements (street lamps, buildings) plus moving light. The contrast gives the effect of motion.
Composition & Creative Tips
Let’s make your shots stand out visually:
Using Leading Lines, Foreground & Reflections
In waterfall shots, use a rock or branch as a foreground anchor so the water flows into it. In city shots, use roads that curve or lights that lead from the edge into the scene. Reflections in water (ponds, puddles) add extra drama.
Experimenting with Time & Motion
Change your shutter from e.g. 2 seconds to 20 seconds and watch how the effect transforms. For water, longer equals silkier. For lights, longer equals longer streaks and more abstract lines. Don’t be afraid to try ultra-long exposures (30 s, 1 minute) in very low light with ND filters.
>>> Lightweight camera tripods CLICK HERE <<<
Post-Processing & Final Touches
Once you’re home with your RAW files:
-
Adjust white balance: water shots may benefit from slightly cooler tones; city lights often warmer.
-
Remove any stray distractions: branches blurred by wind, sensor dust (especially with small apertures).
-
Increase contrast and clarity slightly to bring out details in the static scene while preserving the smooth motion of the blur.
-
Consider cropping for composition and check that highlights (lights) aren’t blown out.
Troubleshooting Common Issues
Here are problems you might face and how to fix them:
-
Blurry static elements: Usually camera shake or bad tripod. Check your mount, use remote shutter.
-
Over-exposed highlights (especially city lights): Reduce shutter speed, lower ISO, use smaller aperture or ND filter.
-
Water not smooth enough or too smooth: If too rigid, increase shutter time; if water looks like a blob, shorten shutter so some structure remains.
-
Windy leaves or tree blur in waterfall scene: Accept the blur creatively, or change vantage so trees aren’t moving, or shoot when wind is calmer.
Conclusion
If you’ve read this far: fantastic — you’re ready to go out and capture silky waterfalls and city lights with easy long exposure techniques. It’s really about preparation (tripod, filters), making the right camera settings, and choosing subjects with movement you can control visually. Whether you’re standing near a cascading stream or atop an urban overlook watching cars zip by, slow down your shutter, steady your camera, and let time reveal its hidden beauty.
Get out there, experiment, have fun — and I promise you’ll be rewarded with images that not only look great, but feel alive.
>>> Lightweight camera tripods CLICK HERE <<<
FAQs
-
Do I always need an ND filter for long exposures?
Not always. If you’re shooting at dusk, overcast or at night, you may get long exposures without one. But in bright daylight, yes—an ND filter gives you longer shutter times without over-exposure. Canon Australia+1 -
What shutter speed should I choose for light trails?
It depends on the scene and how long the moving elements (cars, buses) are in frame. Start around 10-15 seconds and adjust upward for longer streaks; shorter if you want shorter trails. Digital Photography School -
Why use a low ISO for long exposure?
Because long shutter speeds amplify the effect of sensor noise. Keeping ISO at the lowest value helps keep your image clean and sharp. maxphoto.co.uk -
Can I do long exposure without a tripod?
You can try—but stability is key. At shutter times of several seconds, anything less than a very steady mount will result in blur. So a tripod or stable surface is strongly recommended. benharveyphotography.co.uk -
How do I focus if I’m using an ND filter and it’s very dark?
Focus before you screw in the ND filter (or remove it temporarily). Many people compose and focus with the filter off, then attach the filter, lock focus, switch to manual focus, and shoot. This prevents focus hunting in near darkness.Further photo tips here:
Further photo tips here:


