Shooting in Harsh Light: Tips & Fixes
We’ve all been there—you’re outside on a beautiful sunny day, ready to capture stunning photos, only to find your images washed out, with squinting subjects and ugly shadows. Shooting in harsh sunlight is one of the biggest challenges photographers face. But here’s the good news: once you understand how to work with it, you can actually use harsh light to your advantage. Here’s how to shoot in harsh sunlight photography tips.
Why Harsh Sunlight Can Be Tricky
The Challenges of Harsh Light
Harsh sunlight creates extremely bright highlights and deep shadows. This contrast often makes portraits unflattering and landscapes appear flat.
How Harsh Light Affects Colors & Shadows
Strong midday sun can oversaturate colors and create unappealing skin tones. It can also cause raccoon-eye shadows that make subjects look tired.
>>> See TODAY’s deals for light reflectors HERE <<<
Understanding Light Before You Shoot
Identifying the Direction of the Sun
Before clicking the shutter, observe where the sun is. Shooting directly into it versus having it behind you creates completely different effects.
Recognizing the Golden & Blue Hour Alternatives
If possible, avoid the harshest times of the day. Early morning or late evening gives you soft, flattering light.
How to Shoot in Harsh Sunlight Photography Tips
Tip 1: Find Open Shade
One of the easiest fixes is to move your subject into shade. This softens the light and reduces unwanted shadows.
Using Buildings, Trees, or Umbrellas
Look for natural shade like a tree or use artificial shade such as a building or even a large umbrella.
Tip 2: Adjust Camera Settings
Lower ISO for Cleaner Shots
In harsh sunlight, you don’t need a high ISO. Keep it low (ISO 100 or 200) for maximum image quality.
Faster Shutter Speeds for Balance
Use a fast shutter speed to avoid overexposure. Think 1/1000s or faster, depending on your subject.
Aperture Adjustments for Depth of Field
Play with aperture to control background blur. A smaller f-stop (like f/8) helps manage brightness while keeping details sharp.
Tip 3: Use a Reflector or Diffuser
Reflectors bounce light back onto your subject, reducing shadows, while diffusers soften the harshness of direct sunlight.
DIY Diffusion Tricks
Don’t have professional gear? A white bedsheet, sheer curtain, or even wax paper can act as a makeshift diffuser.
Tip 4: Position Your Subject Correctly
Backlighting vs. Front Lighting
Placing your subject with the sun behind them creates a halo glow while preventing squinting eyes. If the sun is in front, soften it with a diffuser.
>>> See TODAY’s deals for light reflectors HERE <<<
Tip 5: Master Fill Flash
Sometimes, a little artificial light makes a huge difference. Use fill flash to brighten shadows without overexposing the background.
Tip 6: Shoot in RAW for Flexibility
RAW files give you more room to adjust exposure, shadows, and highlights during editing compared to JPEG.
Tip 7: Play with Silhouettes
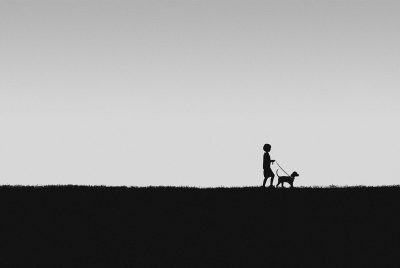
Instead of fighting the sun, embrace it! Position your subject in front of the sun for a dramatic silhouette.
Creative Fixes for Harsh Light Photography
Convert to Black and White
High contrast scenes often look stunning in black and white, where shadows enhance mood instead of ruining the photo.
Use Strong Shadows as a Storytelling Tool
Shadows can add drama and mystery. Play with shapes and patterns created by objects in the sunlight.
Post-Processing Hacks
Adjust Highlights and Shadows in Lightroom
Pull down highlights and lift shadows to recover details lost in harsh light.
Color Grading to Fix Overexposed Areas
A bit of creative grading can bring life back to dull or blown-out sections of your photo.
Common Mistakes to Avoid
Ignoring the Direction of Light
Never shoot without checking where your light source is. Direction can make or break your shot.
Overexposing Without Checking Histogram
The histogram is your friend. Use it to ensure you’re not blowing out highlights.
Forgetting to Use Lens Hood
Lens flare can be artistic, but often it just ruins your photo. A lens hood is a simple, cheap solution.
Final Thoughts
Shooting in harsh light doesn’t have to be frustrating. With the right tricks—finding shade, using reflectors, adjusting camera settings, and embracing creative techniques—you can transform challenging conditions into opportunities for amazing photos.
>>> See TODAY’s deals for light reflectors HERE <<<
FAQs
Q1: What is the best time of day to avoid harsh light?
The golden hour (just after sunrise or before sunset) and blue hour (right before sunrise or after sunset) are best.
Q2: How do I stop my subject from squinting in the sun?
Position them with the sun behind them or move into shade.
Q3: Can I fix harsh light issues only with editing?
Editing helps, but good shooting techniques save time and create better images.
Q4: Do I always need expensive reflectors and diffusers?
No—you can use DIY tools like white cardboard, a sheet, or even aluminum foil.
Q5: Should I use auto mode in harsh sunlight?
Manual mode gives more control. Auto mode often overexposes in bright conditions.
Further photo tips here
Golden Hour Photography: Mastering Nature’s Most Magical Light


