How to Photograph Waterfalls Like a Pro
Waterfalls are one of those magical subjects in photography—they’re wild, powerful, yet incredibly peaceful at the same time. If you’ve ever wondered how to photograph waterfalls with slow shutter, you’re in the right place. In this guide, I’ll show you how to capture that silky, flowing water effect while maintaining sharp, professional-quality images.
Why Waterfalls Are Stunning Subjects
The Movement of Water
There’s something captivating about water in motion. Unlike still subjects, waterfalls are constantly changing, making each photo unique.
Capturing Emotion and Mood
When shot correctly, a waterfall photo can convey calmness, energy, or even mystery. That’s why learning the technique is so rewarding
Understanding the Role of Shutter Speed
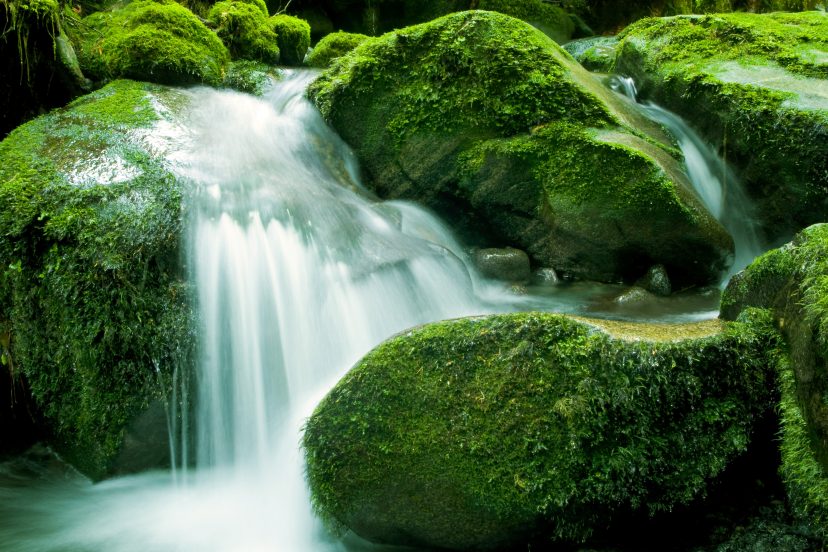
What a Slow Shutter Really Does
A slow shutter speed (think 1/4 second to 30 seconds) lets more light hit the sensor and blurs any movement—like falling water. This creates that creamy, dreamy effect you’ve probably seen in pro-level shots.
Motion Blur vs. Frozen Motion
Want the water to look smooth and soft? Use a slow shutter. Want to freeze each droplet in mid-air? Use a fast shutter like 1/1000s. But for this tutorial, we’re chasing the slow, graceful look.
How to Photograph Waterfalls With Slow Shutter
Best Shutter Speeds for That Dreamy Effect
Start experimenting with 1/2 second up to 10 seconds. The longer the exposure, the smoother the water will appear. Just be aware that too long can sometimes blur other elements (like moving leaves).
Essential Camera Settings
-
Shutter Priority Mode (Tv or S): Let the camera choose aperture.
-
Manual Mode: Gives you full control—ideal for consistency.
-
ISO: Keep it low (100–200) to reduce noise.
-
Aperture: f/8 to f/16 for sharp focus across the scene.
The Right Gear for Waterfall Photography
Camera and Lens Choices
Any DSLR or mirrorless camera will do, but a wide-angle lens (16–35mm) helps you capture more of the environment.
Tripods and Remote Shutters
You can’t shoot with a slow shutter handheld—it’ll blur everything. A sturdy tripod is your best friend. Bonus points if you use a remote shutter or your camera’s timer to avoid camera shake.
ND Filters and Why You Need One
In daylight, a slow shutter will overexpose your image. Enter the Neutral Density (ND) filter—basically sunglasses for your lens. Start with an ND8 or ND64 for waterfall shots.
Planning the Perfect Waterfall Shot
Best Times to Shoot
Golden hour (early morning or late afternoon) offers soft, warm light. Overcast days are also great—they reduce harsh shadows and help expose evenly.
Weather and Water Flow
Waterfalls vary wildly by season. Visit after rainstorms for more dramatic flow, but be cautious—it can be slippery and dangerous.
Safety Around Wet Terrain
Bring waterproof boots and protect your gear. Wet rocks are slick, and it’s easy to slip if you’re not paying attention.
Composition Tips for Impactful Waterfall Photos
Use of Leading Lines and Foreground Interest
Use rocks, fallen logs, or riverbanks to guide the eye toward the waterfall. A strong foreground adds depth and draws the viewer into the scene.
Framing and Perspective Tricks
Try shooting from low angles or behind leaves to add a natural frame. Change positions often to see what composition pops.
Rule of Thirds and Centering Subjects
Don’t always center the waterfall. Placing it off to one-third of the frame often creates more dynamic compositions.
>>> Best place for quality camera gear HERE <<<
Camera Settings Breakdown
Manual Mode Tips
Use Manual mode to lock in your shutter speed, ISO, and aperture. It ensures you get consistent exposures across multiple shots.
ISO and Aperture Pairing
If you’re using a slow shutter, reduce ISO to 100 and set aperture between f/8–f/16 to maintain sharpness and avoid overexposure.
Editing Waterfall Photos After the Shoot
Adjusting Contrast and Highlights
Water can sometimes look flat in camera. Bump the contrast and lower highlights to retain texture in the water.
Enhancing Motion Blur and Clarity
Use clarity and dehaze tools to make surrounding rocks and foliage pop, while preserving that silky smooth look in the water.
Common Mistakes to Avoid
Overexposing the Water
Long exposures in bright light without ND filters will blow out your highlights. Always check your histogram and use filters when needed.
Forgetting About Composition
The silky water is cool—but it’s not enough. Make sure your shot tells a story with good composition and context.
Wrapping It All Up
Learning how to photograph waterfalls with slow shutter isn’t just about technique—it’s about creating emotion and awe in your photos. With the right gear, settings, and some practice, you’ll be capturing waterfall shots that people will stop and stare at. So go ahead—grab your tripod and find your nearest cascade. The magic is out there.
>>> Best place for quality camera gear HERE <<<
FAQs
1. What’s the best shutter speed to photograph waterfalls?
Start with 1/2 to 2 seconds. It depends on how fast the water is flowing and the effect you’re after.
2. Do I need an ND filter to shoot waterfalls during the day?
Yes! Especially in bright conditions. ND filters prevent overexposure while allowing slow shutter speeds.
3. Can I photograph waterfalls with a smartphone?
Yes, with the help of apps that offer manual controls and possibly an ND filter attachment.
4. How do I keep the whole scene sharp?
Use a smaller aperture (like f/11) and focus one-third into the scene to maximize depth of field.
5. What’s the best time of year to shoot waterfalls?
Spring and fall are ideal. Spring offers strong flow from melting snow, and fall gives you colorful surroundings.
Read other relevant posts


