Food Photography: My Ultimate Guide to Capturing Deliciousness
If you’ve ever paused before digging into a beautiful dish just to snap a photo, you already understand the magic of food photography. Today, I’m diving deep into everything you need to know to capture those drool-worthy shots that practically make you taste the photo.
Why Food Photography Matters More Than Ever
We live in a visual world. Whether you’re a food blogger, a restaurant owner, or just someone who loves posting on Instagram, strong food photography can tell stories, spark cravings, and even build brands. Good food photography isn’t just about pretty pictures — it’s about evoking emotions and experiences.
Getting Started: Essential Gear for Food Photography
When I first started, I thought I needed the most expensive camera out there. Spoiler alert: you don’t. Here’s what you actually need:
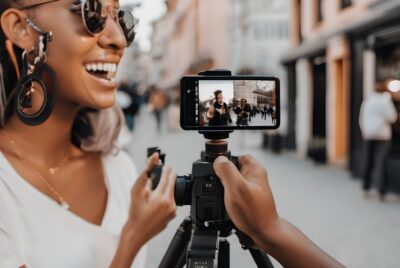
Camera Choices: Smartphone vs DSLR
Your smartphone is a fantastic starting point! Modern smartphones have excellent cameras with features like portrait mode and manual settings. If you want to level up, a DSLR or mirrorless camera offers more control and depth.
Lenses That Make Food Look Mouthwatering
A 50mm prime lens is a game-changer. It gives you that creamy background blur (bokeh) and sharp focus that make dishes look like they’re jumping off the screen.
Tripods: The Unsung Hero
Ever noticed how the pros’ shots are so crisp? That’s because they often use a tripod. It stabilizes your camera, especially in low light, and helps you frame the shot perfectly.
Lighting: The Secret Ingredient
Lighting can literally make or break your photo. I learned this the hard way after shooting gorgeous pasta under harsh kitchen lights — the result was… not appetizing.
Natural Light vs Artificial Light
Natural light is your best friend! A spot near a big window with diffused light is perfect. If you’re shooting at night or need consistency, softbox lights are awesome.
How to Diffuse and Bounce Light
Use a white sheet, shower curtain, or professional diffuser to soften harsh sunlight. To bounce light back onto your food and eliminate harsh shadows, grab a simple white foam board or reflector.
Composing the Perfect Shot
It’s not just about pointing and shooting — there’s an art to it!
Rule of Thirds in Food Photography
Imagine your frame divided into nine equal parts. Place key elements along these lines or their intersections. It brings balance and draws the eye naturally.
Angles That Work Best for Food
Choosing the right angle is like choosing the right outfit — it changes everything.
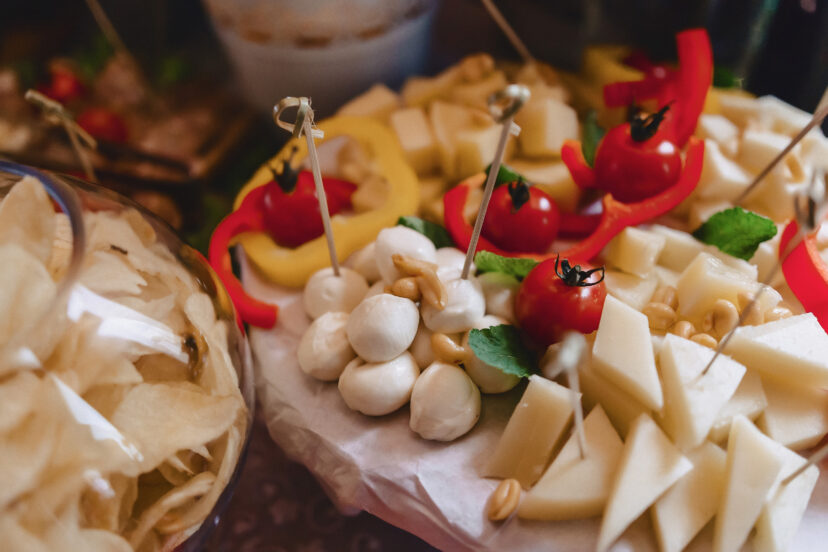
Top-Down (Flat Lay)
Great for tablescapes, pizza, and colorful bowls. It’s all about patterns and composition.
Straight On
Perfect for layered dishes like burgers, cakes, and stacked sandwiches. You want to showcase those luscious layers!
45-Degree Angle
The sweet spot for most foods. It’s natural and lets you capture both the top and sides of the food.
Styling Food Like a Pro
Food styling is like makeup for your dishes — a little goes a long way.
Choosing Props and Backgrounds
Stick with simple, textured backgrounds like wood, marble, or linen. Props (plates, utensils, napkins) should complement, not compete with, your food.
Making Food Look Fresh and Tasty
Ever wonder why pancakes in commercials look perfect? Tricks like brushing meats with oil, misting salads with water, or adding a fresh garnish can keep food looking lively.
>>> Today’s deals for cameras on Amazon CLICK HERE <<<
Editing: Bringing Your Photos to Life
Editing is where the magic really happens — but less is more.
Best Editing Apps and Software
I swear by Lightroom (mobile or desktop). Snapseed is another excellent (and free!) option for quick fixes on the go.
Tips for Natural-Looking Edits
Boost brightness, tweak contrast, and enhance colors just a touch. Avoid heavy filters that make your food look unnatural — unless that’s the style you’re going for!
Common Mistakes and How to Avoid Them
-
Shooting under harsh or mixed lighting.
-
Overediting until the food looks fake.
-
Overcrowding the frame with too many props.
-
Ignoring the story the food tells.
-
Forgetting to clean the plate — small smudges show up big!
Building Your Food Photography Portfolio
Start by creating work for yourself. Make little themed shoots — “Sunday brunch,” “Holiday baking,” “Summer grilling.” Showcase variety and your personal style.
Monetizing Your Food Photography Skills
You can absolutely turn your passion into profit!
-
Offer photography services to local restaurants.
-
Sell photos to stock websites.
-
Create content for food brands.
-
Teach classes or workshops.
The opportunities are as endless as the dinner menu at Cheesecake Factory!
Conclusion: Your Journey Into the Delicious World of Food Photography
Food photography is a beautiful blend of art, technical skill, and a whole lot of heart. Like cooking itself, it’s about experimenting, learning from mistakes, and most importantly — enjoying the process. Whether you’re snapping your morning smoothie or building a portfolio to land clients, remember: every shot you take is a step forward. So grab your camera (or phone), chase that beautiful natural light, and start capturing the deliciousness all around you.
>>> Today’s deals for cameras on Amazon CLICK HERE <<<
FAQs
Q1. What’s the best time of day to shoot food photos?
Early morning and late afternoon (golden hour) offer soft, flattering natural light — but any time near a bright window works!
Q2. How do I make food look fresh during long shoots?
Keep a spray bottle of water or oil handy to refresh veggies, fruits, and meats during shoots.
Q3. Do I need a professional studio setup to take great food photos?
Not at all! A bright window, a few reflectors, and a simple backdrop can give you pro-level results.
Q4. How important are editing skills in food photography?
Very important! Even a great photo can benefit from subtle editing to correct lighting, boost colors, and sharpen details.
Q5. What’s a good beginner project to practice food photography?
Try a “one ingredient, three ways” shoot — it challenges your creativity and helps you practice different angles, styles, and setups.
Further reading
Check out our other relevant articles:
Here are two valuable resources that complement the content of the article on food photography:
-
The Serious Eats Guide to Food Photography
This comprehensive guide offers practical advice on capturing crisp and clear food images. It emphasizes the importance of managing ISO settings to maintain image quality, especially when shooting in various lighting conditions. The guide is particularly helpful for beginners looking to understand the technical aspects of food photography. -
99 Food Photography Tips – Two Loves Studio
This extensive collection provides a wealth of tips from photographers at different stages of their creative journey. It covers various aspects of food photography, including lighting techniques, styling hacks, prop selection, and mindset strategies. The resource is designed to inspire and educate photographers aiming to enhance their food photography skills.
Feel free to explore these resources to deepen your understanding and proficiency in food photography!